• Home
  • Our Rig
  • Resources
  • Menu
  • Skip to right header navigation
  • Skip to main content
  • Skip to secondary navigation
  • Skip to primary sidebar

Pineapple Voyage

Follow us as we share our adventures RVing around the country in our “tin can”!

  • Home
  • Our Rig
  • Resources
RV at Bonneville

Defective RV Leaf Springs: Go Big Or Go Home!

May 27, 2019 By //  by Philip Leave a Comment

This site contains affiliate links. Which means we may receive a commission, at no extra cost to you, if you purchase a product or sign up for a service on this page.
Share
Pin40
Tweet
40 Shares

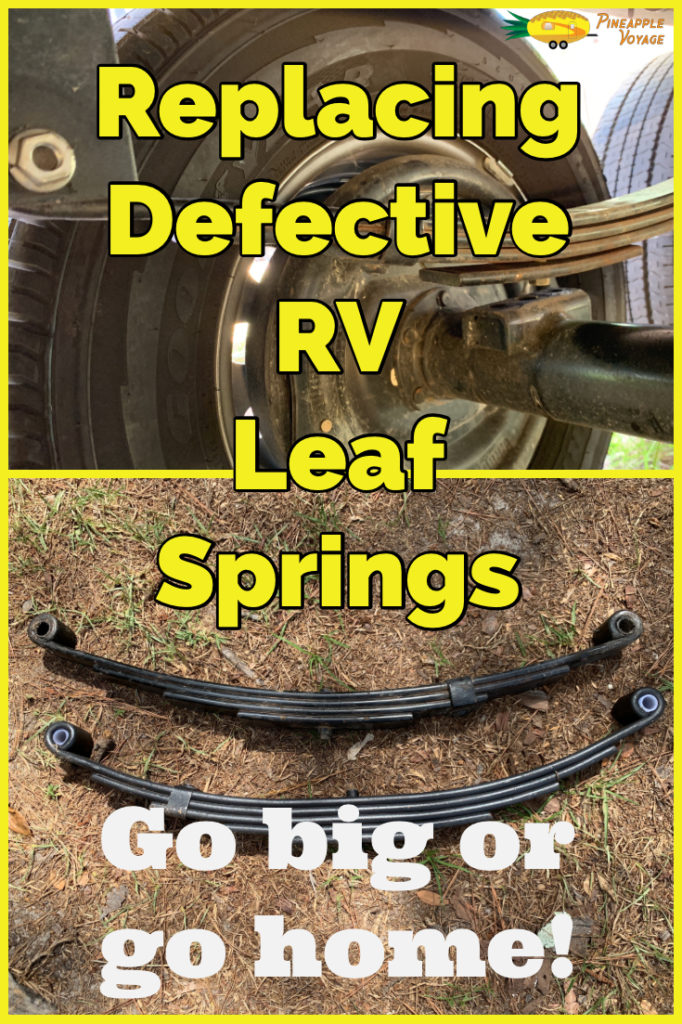
What does one do when you have a defective leaf spring on your RV? Or when the new, supposedly heavier, leaf springs you just installed don’t appear to be up to snuff? Well, if your me, you go and get even heavier leaf springs for the job. 

The Problem

Defective RV leaf spring

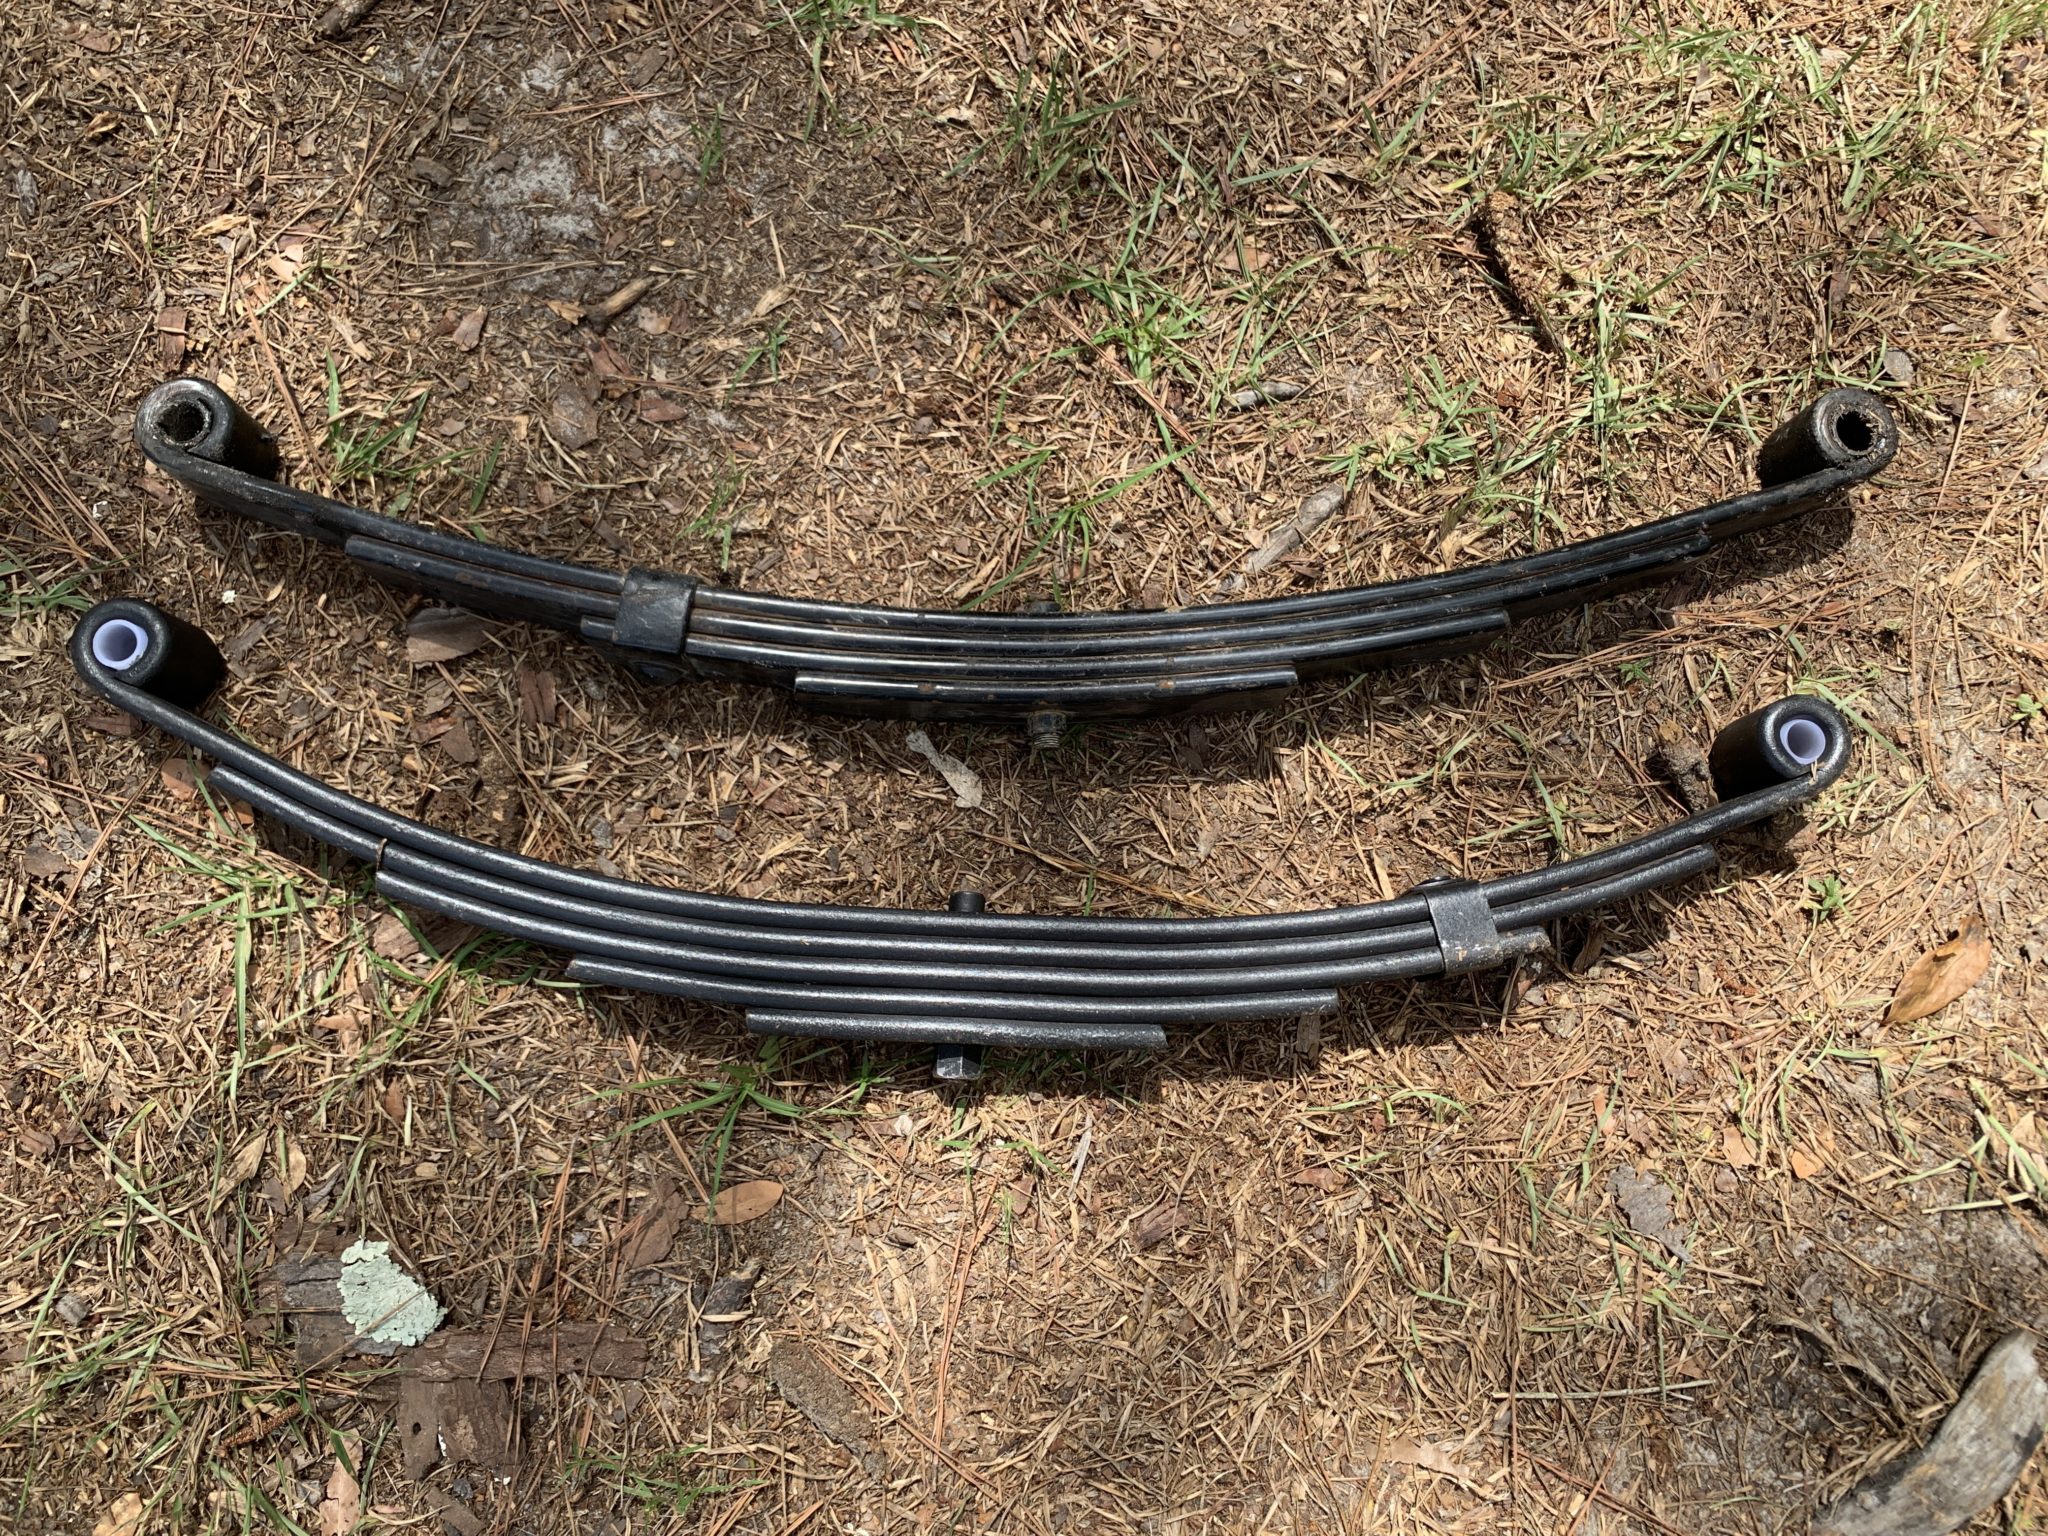
As you may recall, a few months ago I replaced our 3,500lb leaf springs on The Tin Can. In their place, I installed 5,000lb springs. Well, those springs at first seemed, for the most part, a little better than the originals. That is by sticking my head under the trailer and looking at them. But then, after about a thousand miles. Or about 2 or 3 days worth of traveling for us. One of the springs started looking way overloaded. This was very concerning to me! We haven’t weighed in quite some time. But we shouldn’t be overloading these springs. 

A Small Confession

The truth is I have been a little regretful of not going bigger on my leaf springs from the beginning. They were just sitting a little flatter than I thought they should. So what was I to do? Well, that was get some 6,000lb springs! That was what I was to do. It was money I hated to re spend, but leaf springs are fairly inexpensive. So I ordered a set to install. 

We Need Some Support

With the new leaf springs arrival, it was time to jack up and set The Tin Can up on blocks. This go around I had cement blocks to set it on. They were much easier to deal with than the cut logs I used the first time. This was a plus. 

Removing The Defective RV Leaf Springs

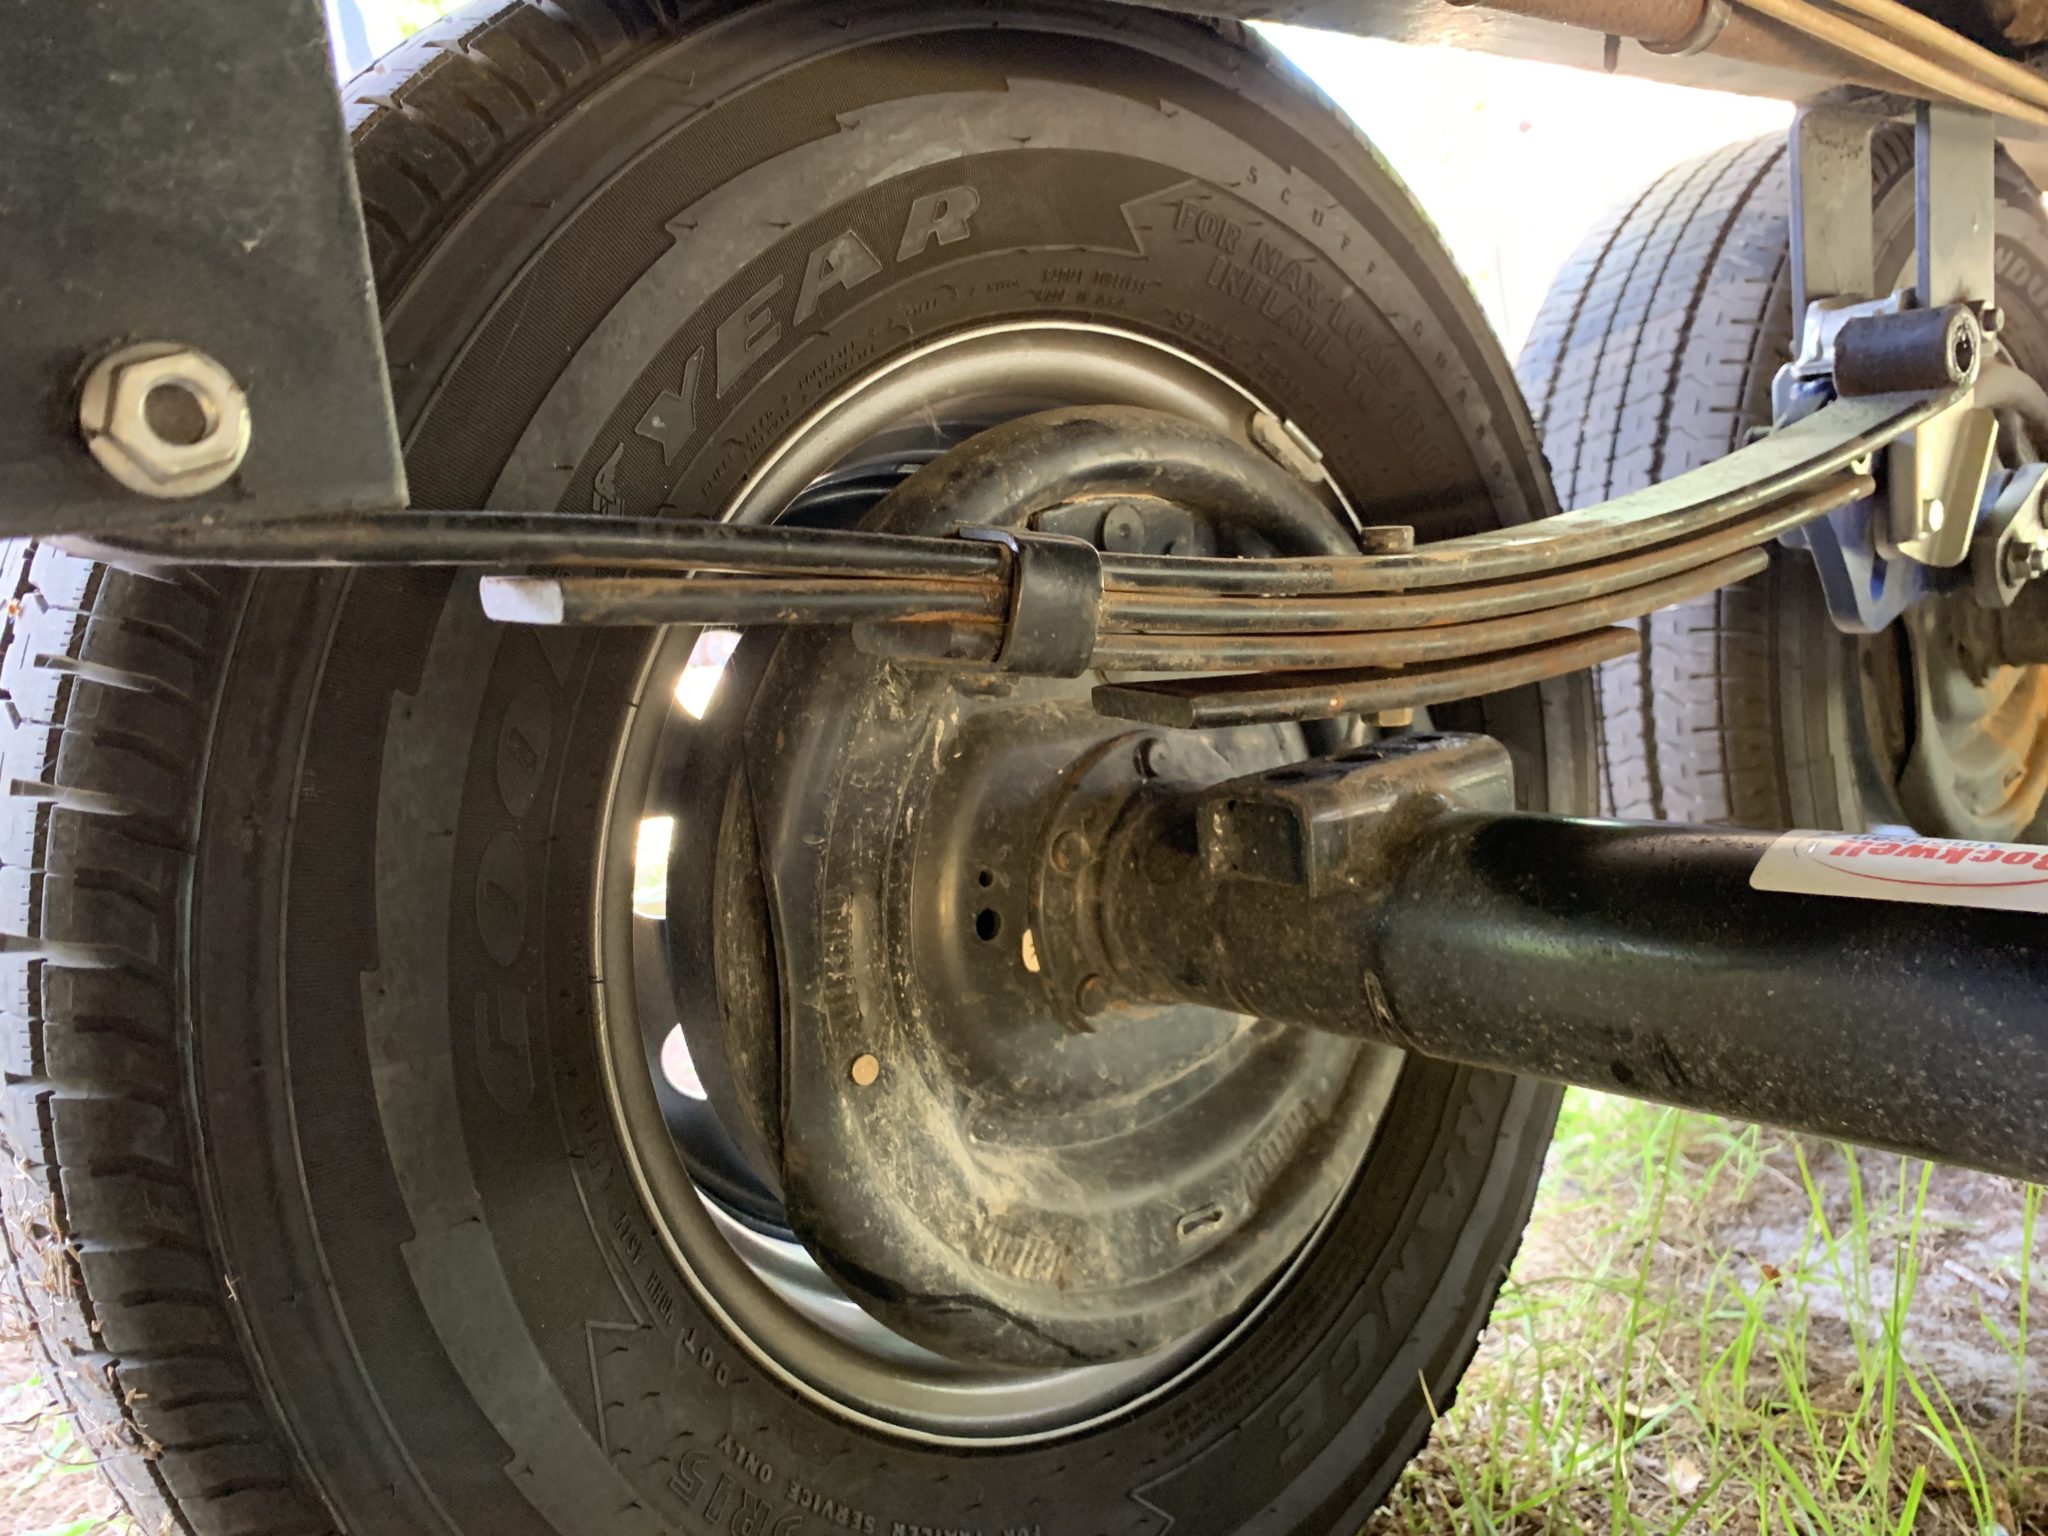
Now to remove the old springs. I started out by removing the axle u-bolts and letting the axle’s wheels drop to the ground. Now it was time to actually remove the defective RV leaf springs. You may remember about how the spring hanger bolts are knurled. And that I had to drive them out while bracing the hanger with a 2×4. Smashing up the end of the bolts. Fortunately this time I was able to knock the bolts out using only a rubber mallet. This was a big-time plus. I was afraid of ruining my new grease-able wet bolts. On the other end of the spring the shackle bolts, being both attached to one side of the shackle, slid right out together. Easy enough! As you may have noticed in the image above. One of the leaf springs actually bent under the load.

You Guessed It, There Was A Problem

Of course, with any job, there have to be some challenges. This job proved to be no different. Before I started install the new springs. I noticed that the nuts on the bolts holding the leaf springs together looked a good bit bigger than my old ones. So I took one of the spring to see if it was going to fit the axle or the plate that sits on top of the springs. Sure enough the nut was too big. And also the bolts from the old springs were too short to fit the new ones. So, it was off the auto parts store to pick up some new ones. The new bolts were super long and had to be cut to fit.  But that really was no big deal. 

Problem Number 2

5,000 and 6,000lb RV leaf springs

Now that I had the new leaf springs ready to go, I got the first set hung in no time. Then I tried installing the first set of u-bolts. And guess what? They were too short. Going from 5,000lb springs to 6,000lb ones, added another leaf. And this additional leaf made my all but 2 of my existing u-bolts too short to properly thread through the nut. So, back to the auto parts store again for new u-bolts. Now I was able to finally finish the job. 

The Take Away

The new leaf spring install ended up taking me 2 days complete. I got a late start the first day and with 2 trips to the parts store. It was just too much for me to complete in one day. So, if your planning on upgrading your leaf springs to a set that has more leaves than your existing set. Be sure and check the leaf spring bolt and nut fit the axle and the u-bolt plate. And also make sure your u-bolts are long enough for the new set. This will save you a lot of time on the install. 

Thank you for reading! And safe travels and happy camping!

Please Like and Share us on social media! Also, subscribe to our email list to stay up to date on new posts! Please leave a comment telling us what you think.

Replacing defective leaf springs
Share
Pin40
Tweet
40 Shares

Category: RV RenovationTag: 5000, 6000, adventure, adventures, camp, camper, camping, defective, defective leaf spring, families, family, full-time, fulltime, lbs, leaf springs, overload, pound, rv, springs, The Tin Can, trailer, travel, traveling, upgrade

Previous Post: « Choosing a Domicile State
Next Post: Using a Mail Service »

Reader Interactions

Leave a Reply Cancel reply

Your email address will not be published. Required fields are marked *

Primary Sidebar

This site contains affiliate links. Which means we may receive a commission, at no extra cost to you, if you purchase a product or sign up for a service on this page. The products and services on this site are mentioned because we believe in them and feel that they may be of value to you. 

Subscribe!
Get the latest content first.
Supporting your fulltime RV adventures and aspirations Open Roads Bookkeeping RV Health

Recent Posts

  • Knocking Out The Reno List
  • Not Dead Yet!
  • Repairing A Splendide Washer/Dryer Not Draining
  • Installing Computer Wall Mounts In The RV Motorhome
  • Changing Into Our New RV

Categories

  • About us
  • Blogging
  • Life
  • Organization
  • Recipes
  • Restaurants
  • RV Gadgets & Accessories
  • RV Maintenance
  • RV Renovation
  • Saving Money
  • Travels
  • Work

Archives

  • January 2024
  • August 2023
  • December 2019
  • November 2019
  • October 2019
  • September 2019
  • August 2019
  • July 2019
  • June 2019
  • May 2019
  • April 2019
  • March 2019
  • February 2019
  • January 2019
  • December 2018
  • November 2018
  • October 2018
  • September 2018
  • August 2018
  • July 2018
  • June 2018
  • May 2018
  • April 2018
  • March 2018
  • Home
  • Our Rig
  • Resources

Site Footer

Privacy Policy
Terms and Conditions

Copyright © 2025 · Mai Lifestyle Pro On Genesis Framework · WordPress · Log in