
Recently we transferred our WordPress sites over to Bluehost. Angelica and I have created and maintain several websites, most of which are WordPress. Those sites have all been hosted by the same company on a web developer package. Our attitude about the hosting company has always just been so-so. Reliability hasn’t been a problem, we just haven’t liked dealing with them very much.
Disclosure: This site contains affiliate links. Which means we may receive a commission, at no extra cost to you, if you purchase a product or sign up for a service on this page. The products and services on this site are mentioned because we believe in them and feel that they may be of value to you.
Since staring Pineapplevoyage I have been listening to more podcast on RVing and entrepreneurship. I have also been reading other blogs on the same topics. A common thing that everyone promotes is Bluehost web hosting. With everyone using Bluehost we figured they must be pretty good, so I contacted them for a recommended hosting package.
Choosing A Hosting Package
I informed the Bluehost representative that I have multiple domains that I was going transfer over to them. They suggested the Choice Plus. Shared Hosting package. The package includes unlimited domains, emails
Step 1. Preparing To Transfer Your WordPress Site
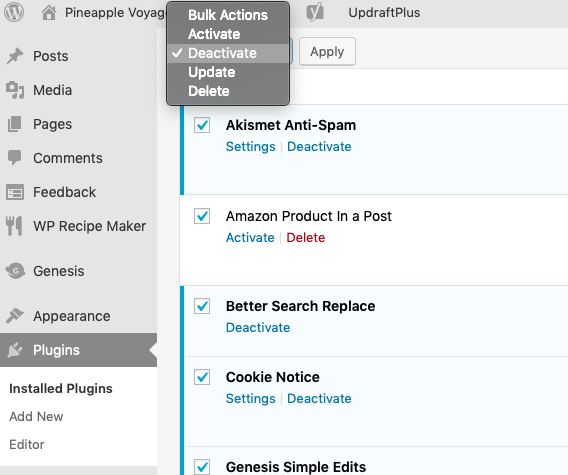
The first step you should take in tranfering over a wordpress site is to deactivate your plugins. I learned the step the hard way and will explain the steps I had to take later in the article.
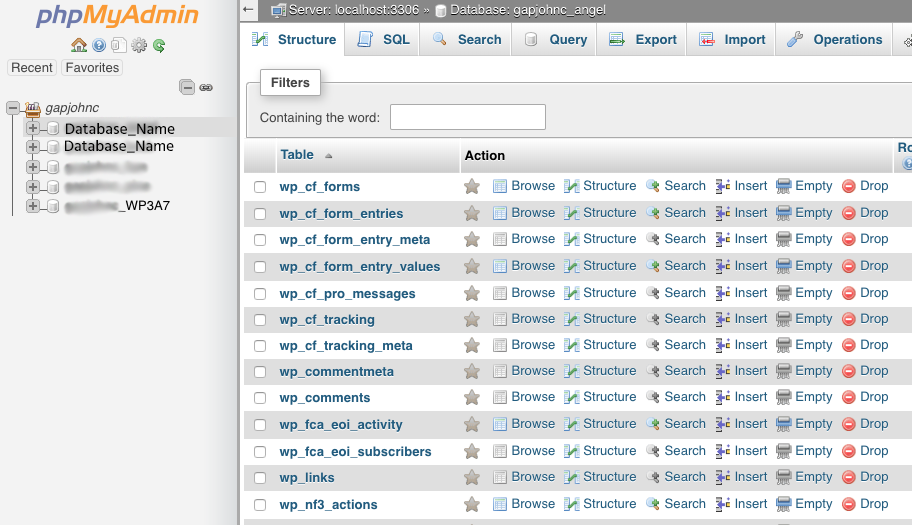
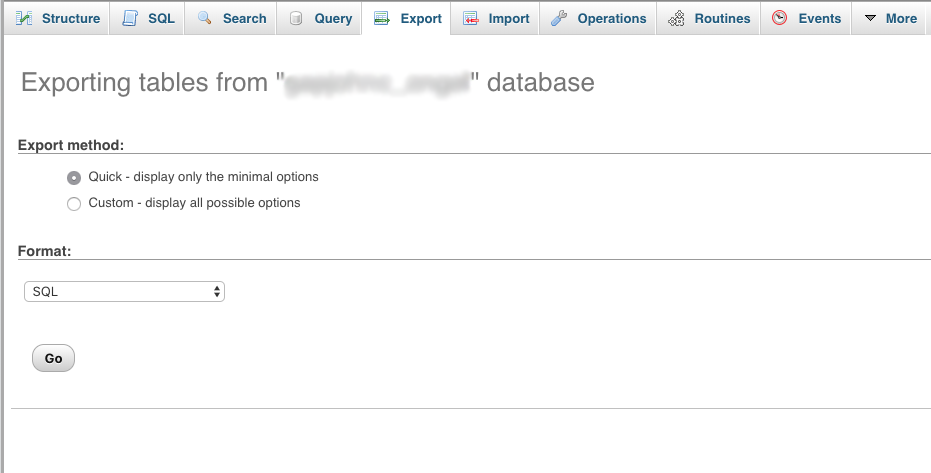
With the plugins deactivated the next step is to download your WordPress files through an FTP client or a full site backup. The file download can take some time to perform so be patient. A database export also needs to be performed on your hosting company’s cPanel using phpMyAdmin. In phpMyAdmin, you will see a list of your databases on the left side of the screen. Select the database for your WordPress site and select Export in the menu bar and then Go. Your database file will be downloaded to your computer.
Step 2. Starting The Domain Transfer Process
Now that you have your files and database downloaded it’s time to start the domain transfer process. You will need to be logged both your current and your new Bluehost accounts.
Unlocking The Domain
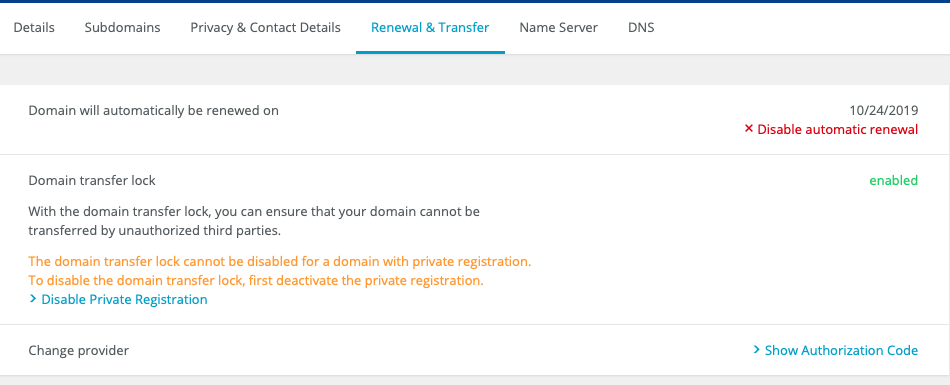
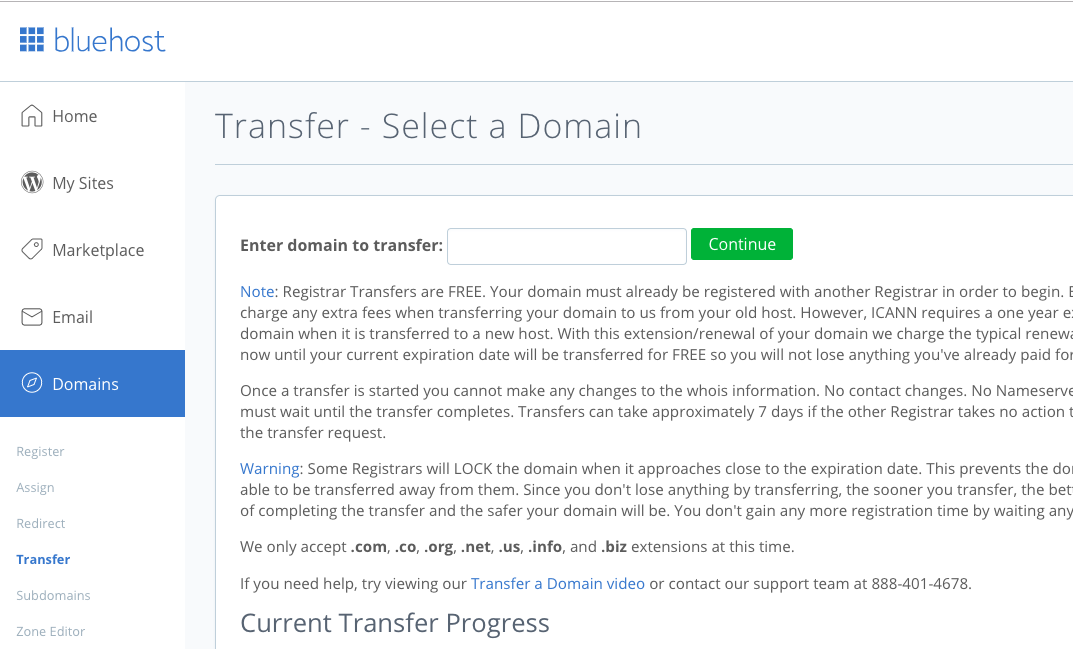
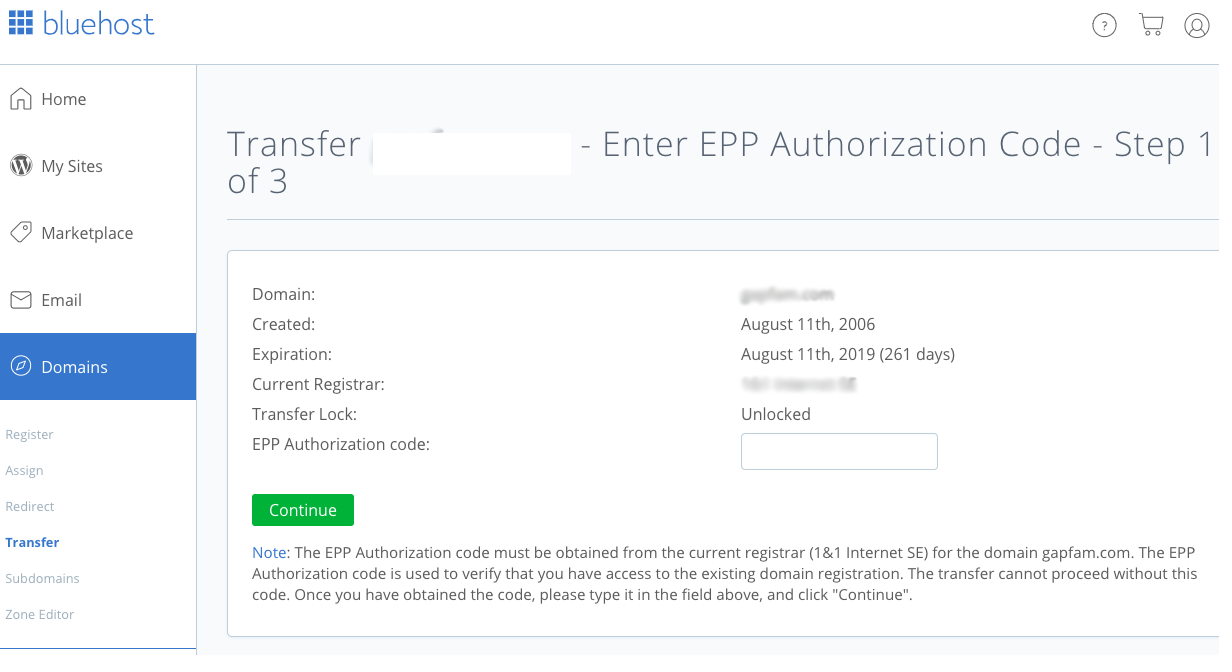
Under your current hosting select the domain to transfer and follow the steps to disable any site transfer locks and obtain an EPP Authorization Code, copy this code. Next head over to your Bluehost account and under the Domains submenu select transfer. Enter your domain name and click continue. You should now have a screen with your domain information and entry box for your EPP Authorization Code. This should get your domain transfer in motion.
Assigning Your Domain In Bluehost
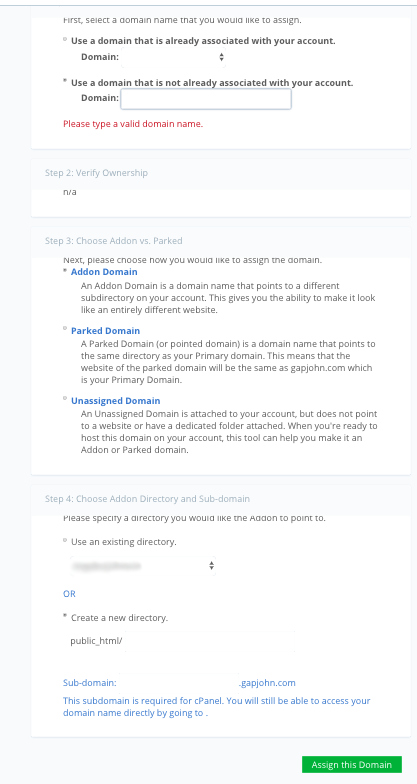
The domain name now needs to be assigned or parked, as it’s called on one of the transfer process screens. At the top of the screen if you cannot select your domain from the drop-down list, enter it into the box for domains not associated with your account. If you have multiple domains, choose how to assign it. I assigned mine as an addon since they are all different websites. Then create a new directory for your site. You now have a place to upload your website!
Step 3. Create A New Database
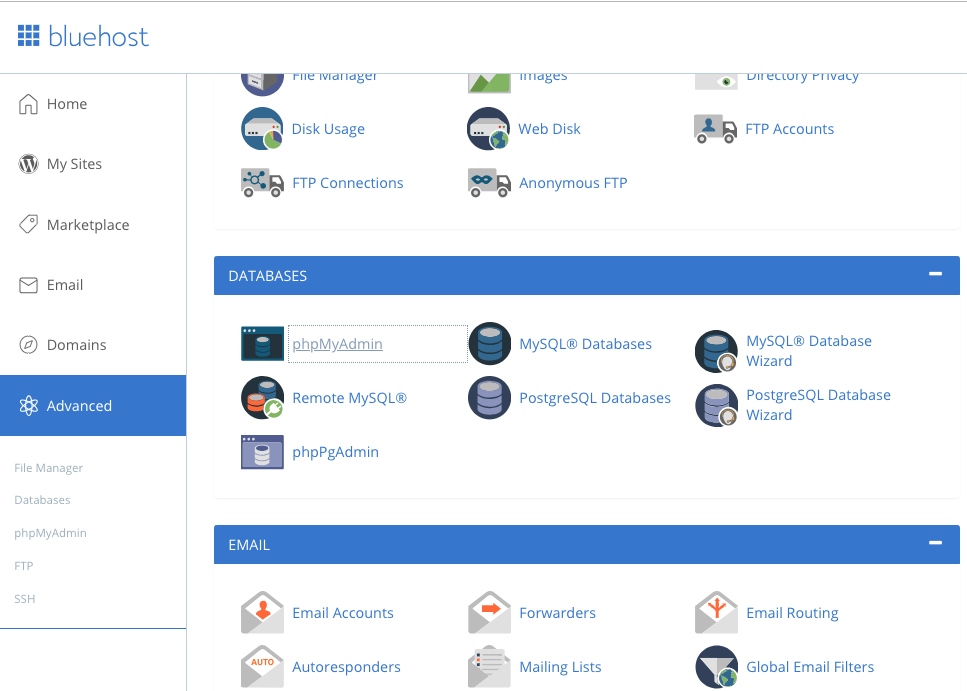
Next up is to create a database for the WordPress site. I tried to do this next step in the Safari web browser, but it would not work and I had to switch over to Chrome instead. In our Bluehost account, select Advanced in the side menu, it may prompt you to log in again. You should now be in the cPanel, and able to select the MySQL Database Wizard. Follow the steps to create your new database and database user. Save this information, especially the password, to a note.
Step 4. Uploading Files
After you have created your new database you need to edit the wp-config.php file of your

Uploading WordPress Files
So, we now have our domain transfer started, folder, and database created. It’s time to start uploading our files. I used the cPanel username and password to log with my FTP client, which opened to the root directory of my account. From the root directory navigate to public_html folder, then to your domains folder, if this is your only domain the files can be placed directly in public_html. Upload your WordPress files to your folder, again this may take a little time to complete.
Import The Database
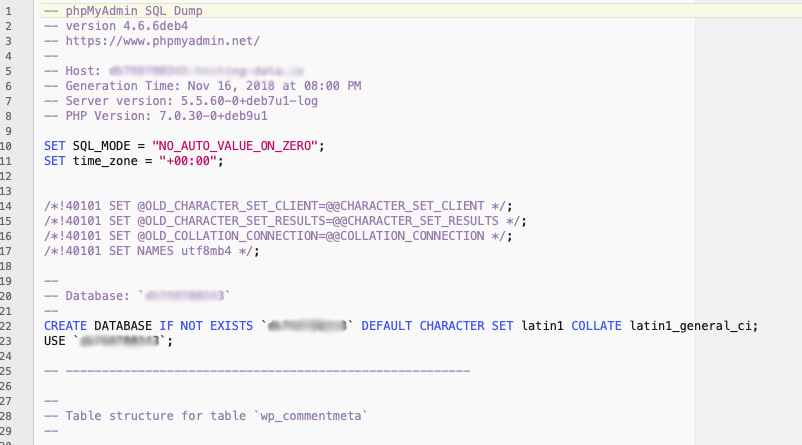

Now it’s time to import your database, but before we import it, it may need a small edit. Open the database .sql file in a text editor. Near the top of the file, if there is a line that says, ‘CREATE DATABASE IF NOT EXISTS…’, delete that line and save. Go to the Bluehost cPanel and select phpMyAdmin and on the left side of the screen find your database and select it. Now click import on the menu bar, then Choose File and select the .sql file you exported and edited. Make sure the SQL format is selected and click Go. Your database should now import.
A Successful Transfer Of Your WordPress Site To Bluehost
You should now be all set! We now know how to transfer a WordPress site to Bluehost. And after your domain transfer completes you should still have a working WordPress site with no downtime
Lesson I Learned Too Late

As I mentioned earlier, I learned about deactivating plugins the hard way. I did not deactivate mine and my WordPress sites were not working, just a blank white screen. To get the sites working again, I logged in with my FTP client and renamed the W
Conclusion
I hope this how to is helpful to you! And if you are looking for web hosting, check out Bluehost! They are very affordable and have excellent customer service! They provide SSL certificates for all domains hosted, which I had to purchase with my old hosting provider. My experience with Bluehost has been all positive so far which I could not say about our previous web host.
Please Like and Share us on social media! Also, subscribe to our email list to stay up to date on new posts! Please leave a comment telling us what you think.
