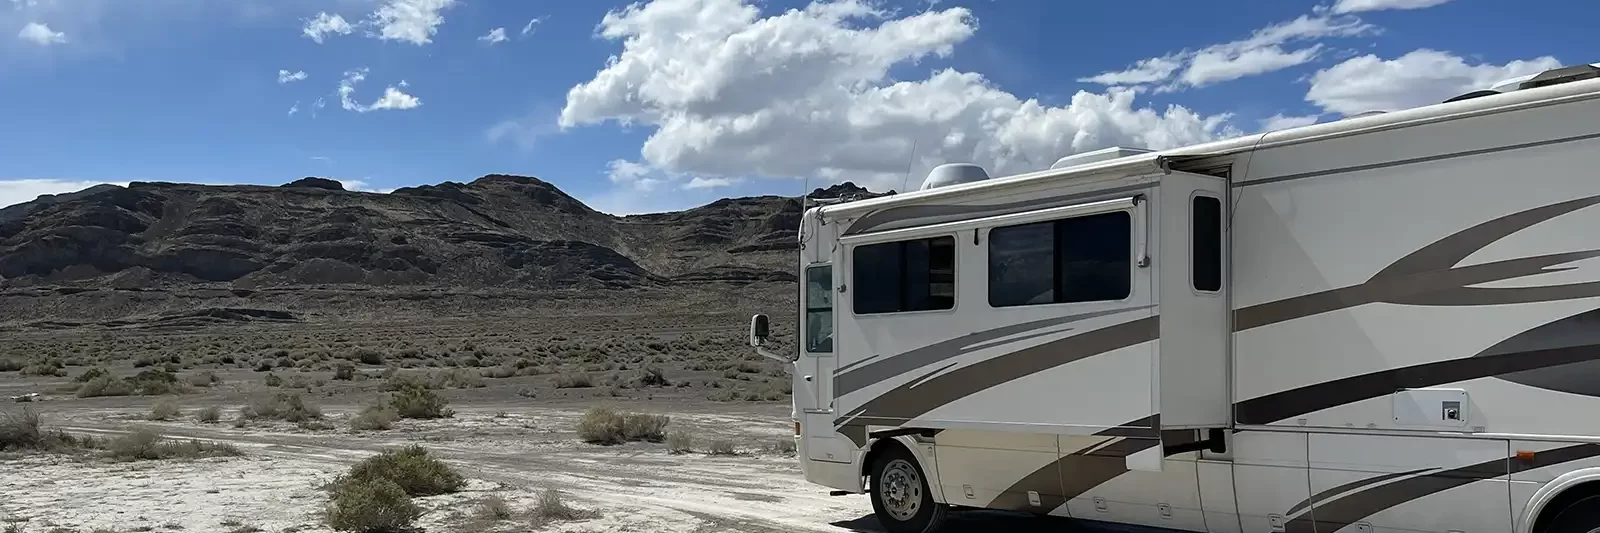
Taking a slightly different approach with tin roof wall covering.
Covering walls with galvanized roofing panels is a fairly simple project. Which may be one of the reasons that it has become fairly popular. I’ve seen it used in places from tiny houses to restaurants. I really like the look and it’s definitely durable. I mean, yeah you could scratch it, maybe slightly, but your not likely to knock a hole in it. It’s been something I have been wanting to put somewhere for a while now and shower walls seem like the perfect place.
Disclosure: This site contains affiliate links. Which means we may receive a commission, at no extra cost to you, if you purchase a product or sign up for a service on this page. The products and services on this site are mentioned because we believe in them and feel that they may be of value to you.
So when we were remolding the bathroom in The Tin Can, we went back and forth on exactly what to do with the shower walls. We would talk about going with the tin roofing, then we would decide just to paint. The ideas went round and round for awhile. Finally, we decided to just to paint the shower walls. The thinking was, not many people are going to see it and the paint will brighten it up some. So that’s what we did. It came out looking pretty good. But then… as I was pulling the painter’s tape off the edge of the tub, the paint started peeling off the wall. Ugh! That led us to the decision to cover the wall with tin roofing.
The Hunt
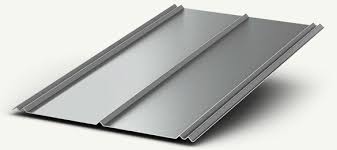
On our next trip to Lowe’s, we looked at the different styles of roofing tin. We didn’t want something that had too high a profile to it. In an RV shower, every bit of space is precious. We didn’t want to take up any more of the space than we had to. That gave us the idea to use 5V roofing panels. It’s the one, pictured above, that has one v down the middle and two down each side. It doesn’t intrude the shower area very much and also has large flat areas that would make reinstalling the faucet easier too. All of that made us feel like we had made a good choice. So we picked up two 12 foot pieces and headed home.
Angelica had
Installing The Panels
To bend the roofing, I thought about clamping the panel between two pieces of wood and try to bend it that way. But instead, I did some calling around and found a local metal fabricator that bent it for me. They turned out perfect, I don’t think I could have come close to making the bends that they made for me.
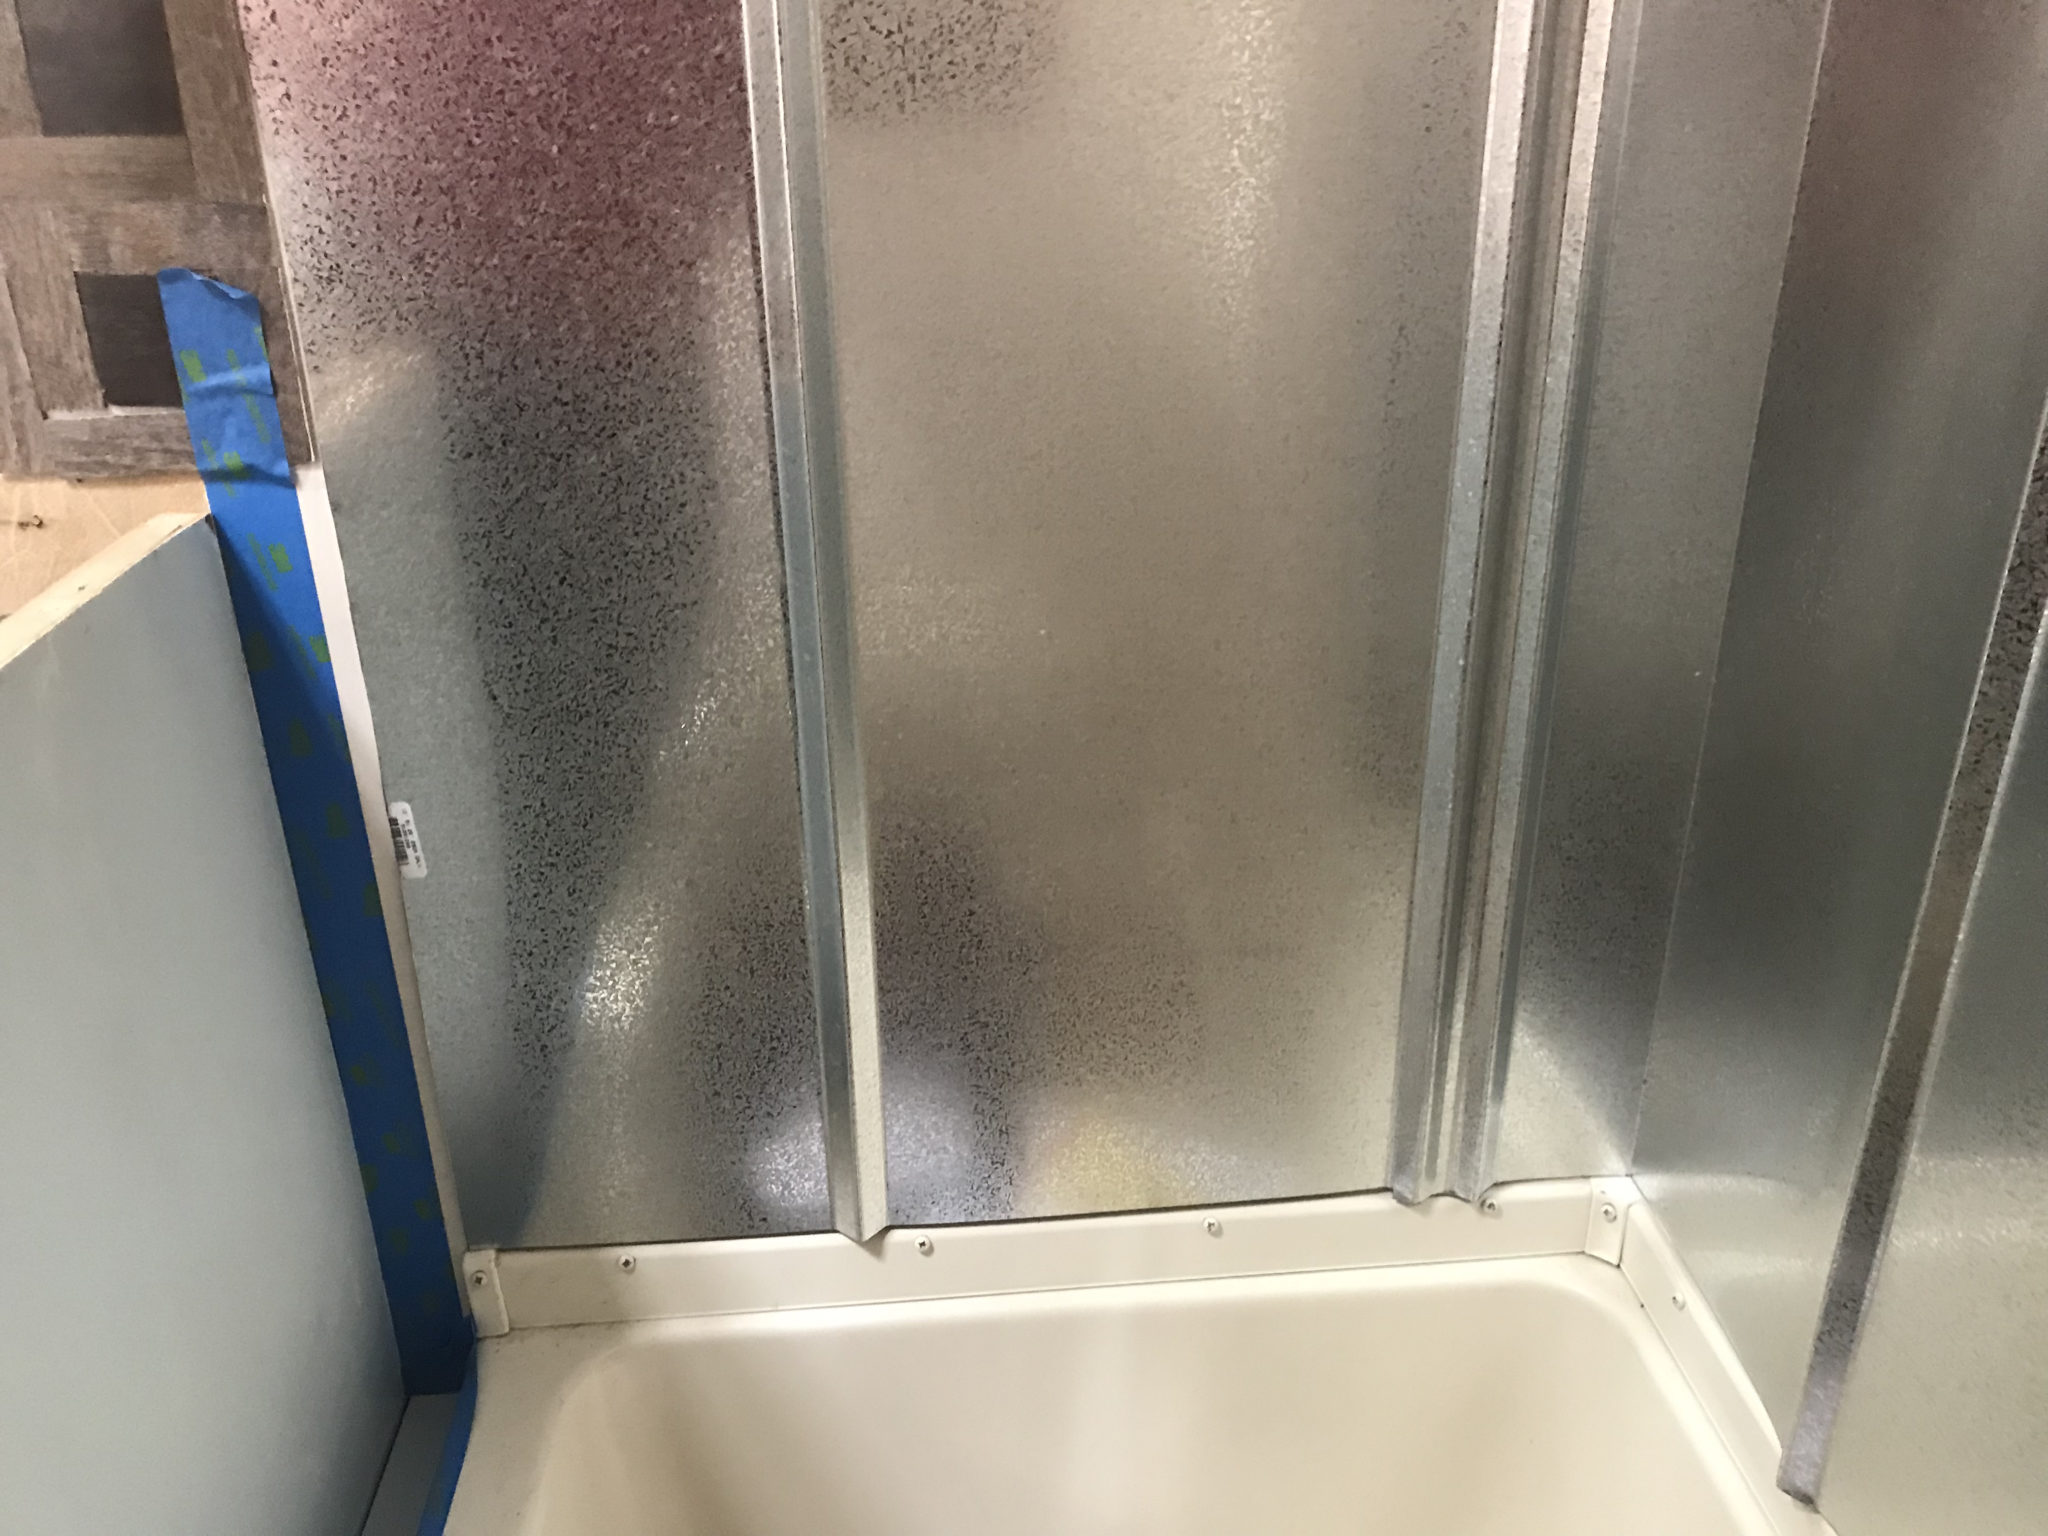
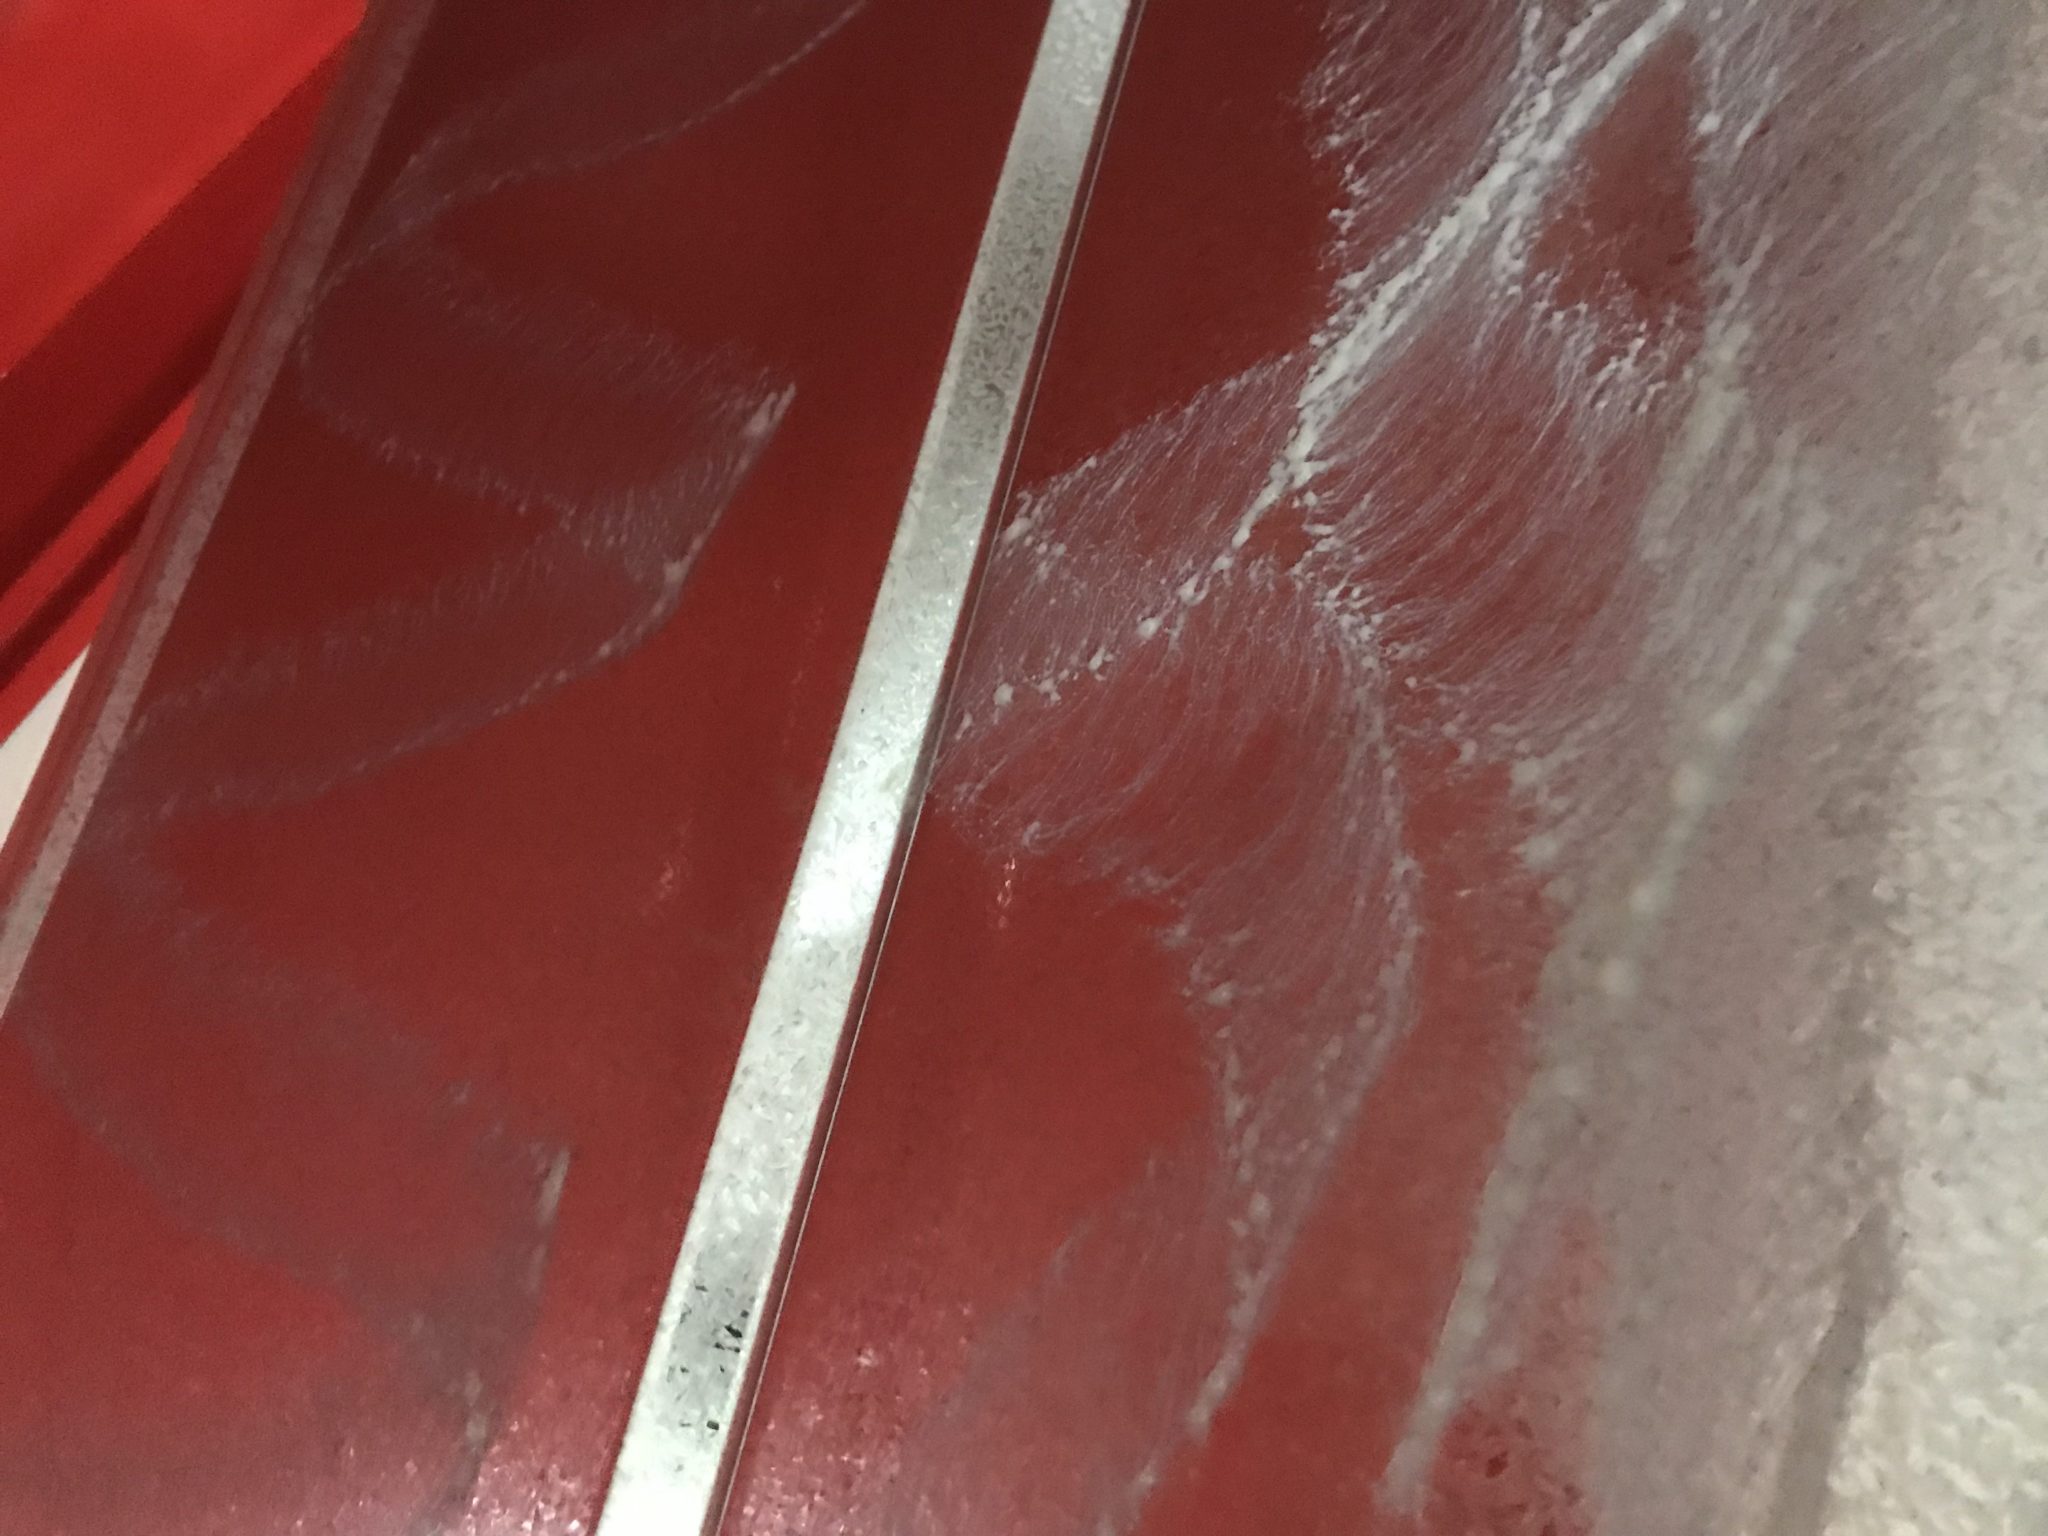
As usual, there had to be some sort of problem. This time it was with painting the roofing panels. The first coat of paint went on beautifully. But then when it came to the second coat, the paint started wrinkling up. I stopped and sanded back to bare metal. Started painting again and any place new paint went over existing paint it did the same thing. I think that it might have had something to do with the temperature of the metal. With it laying on the concrete drying it was a good bit cooler than the air and paint was. Whatever the reason for it, we figured it was best just to let it dry like it was. There again, it adds to the rustic look. To add a little more to th look, we also scuffed up the paint in a few areas with sandpaper.
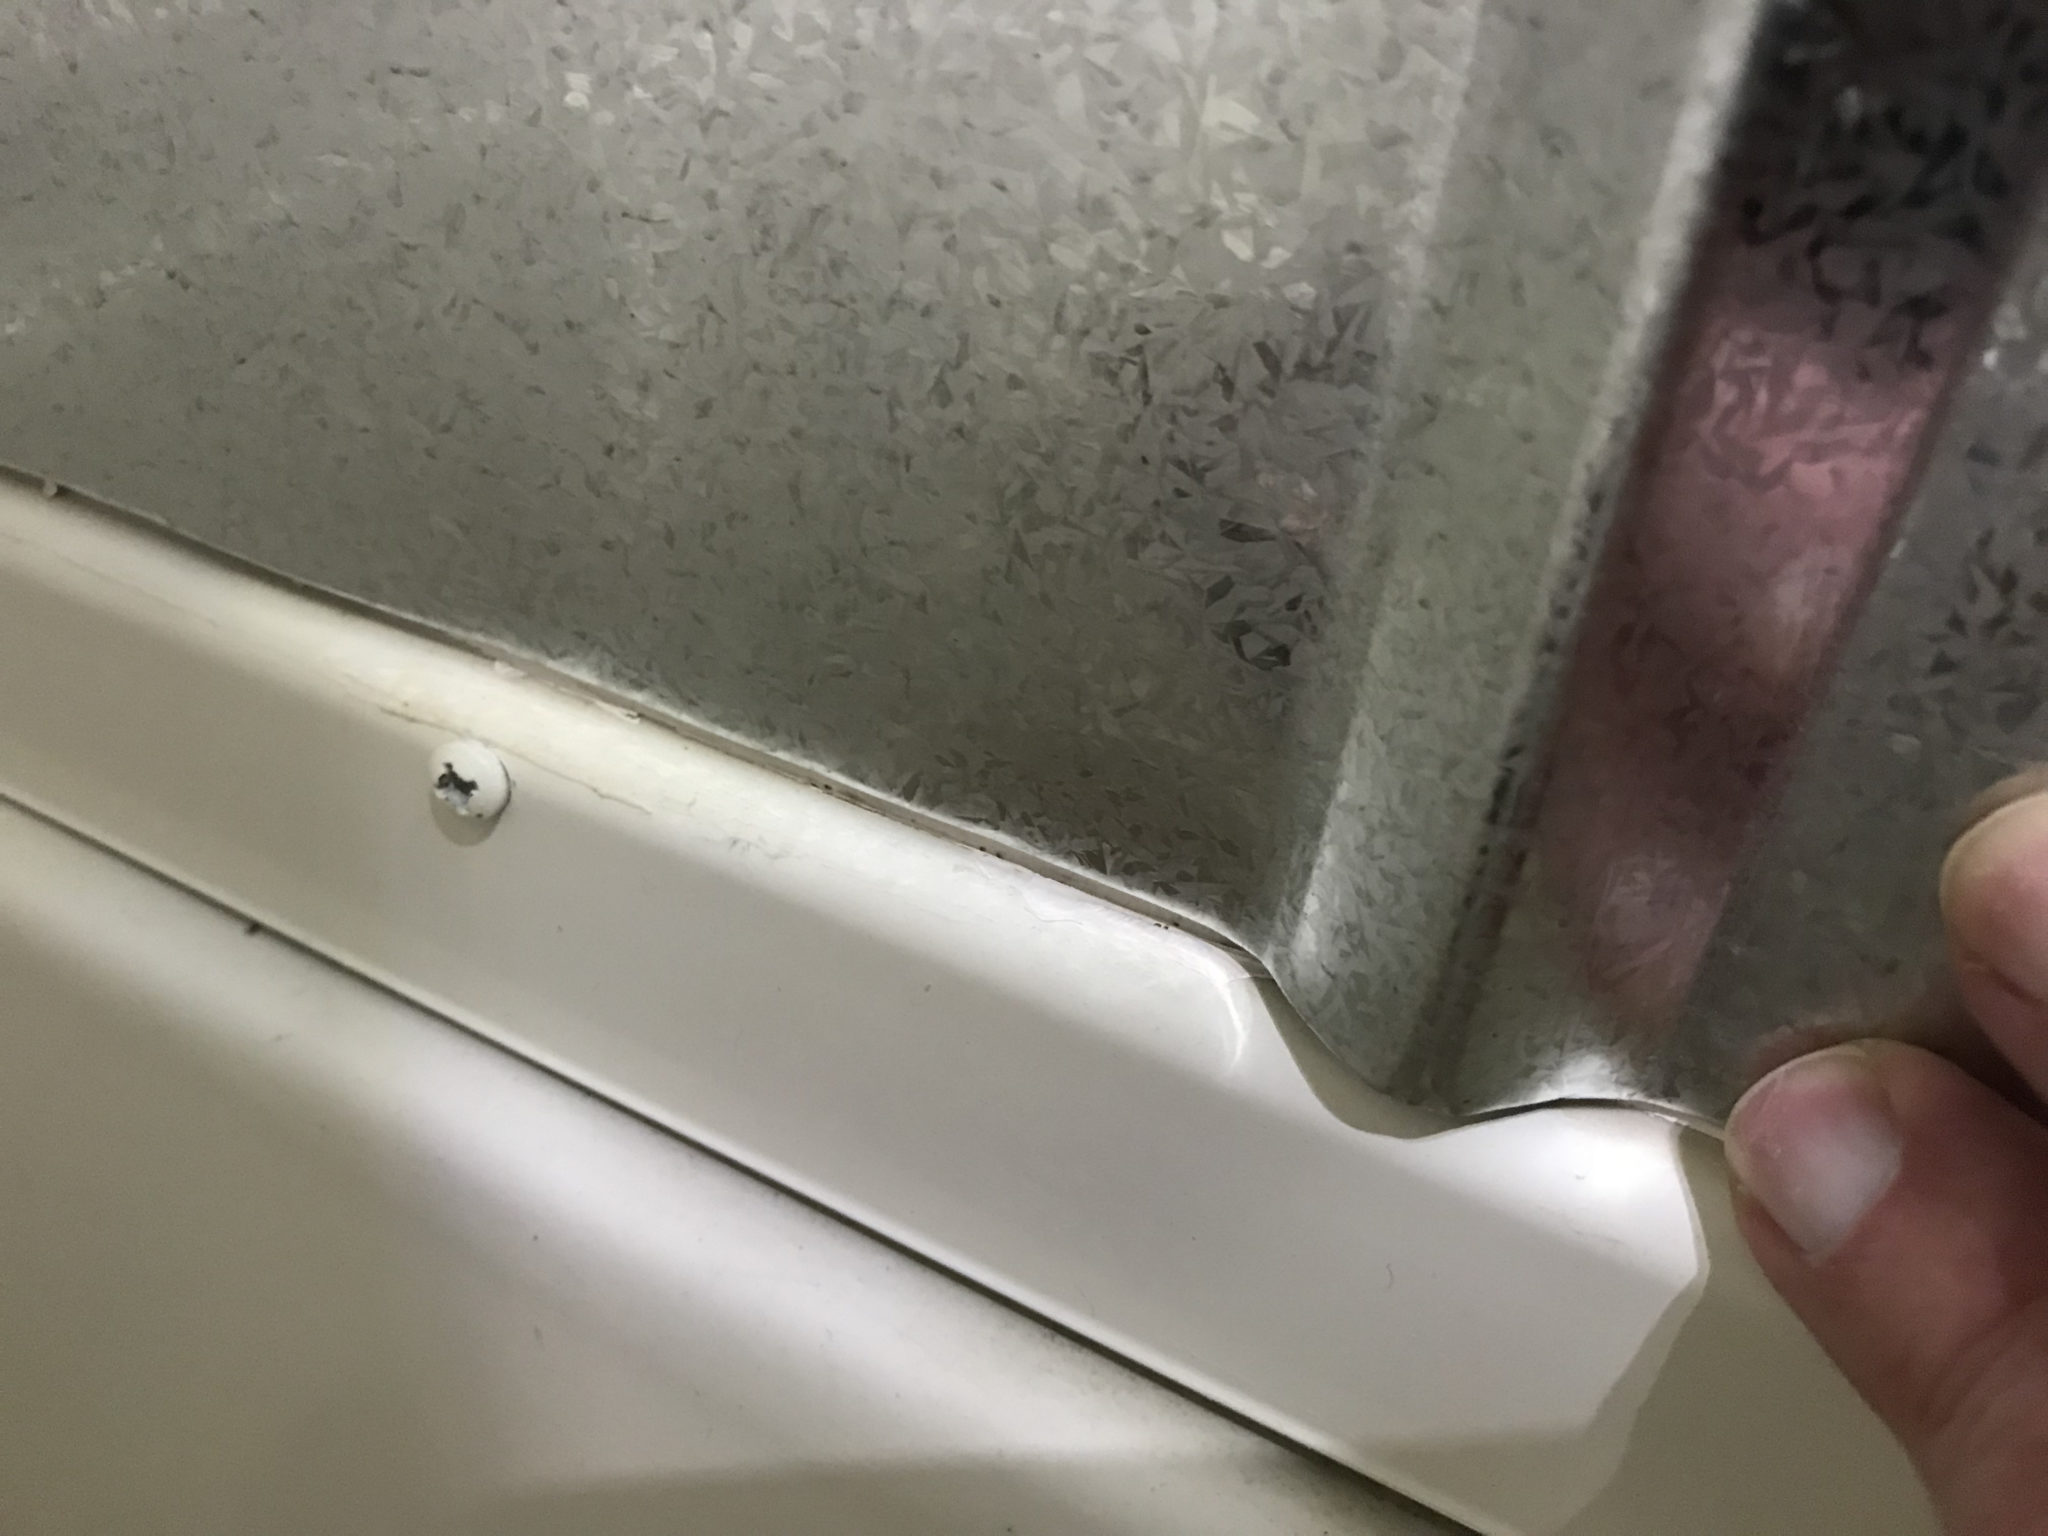
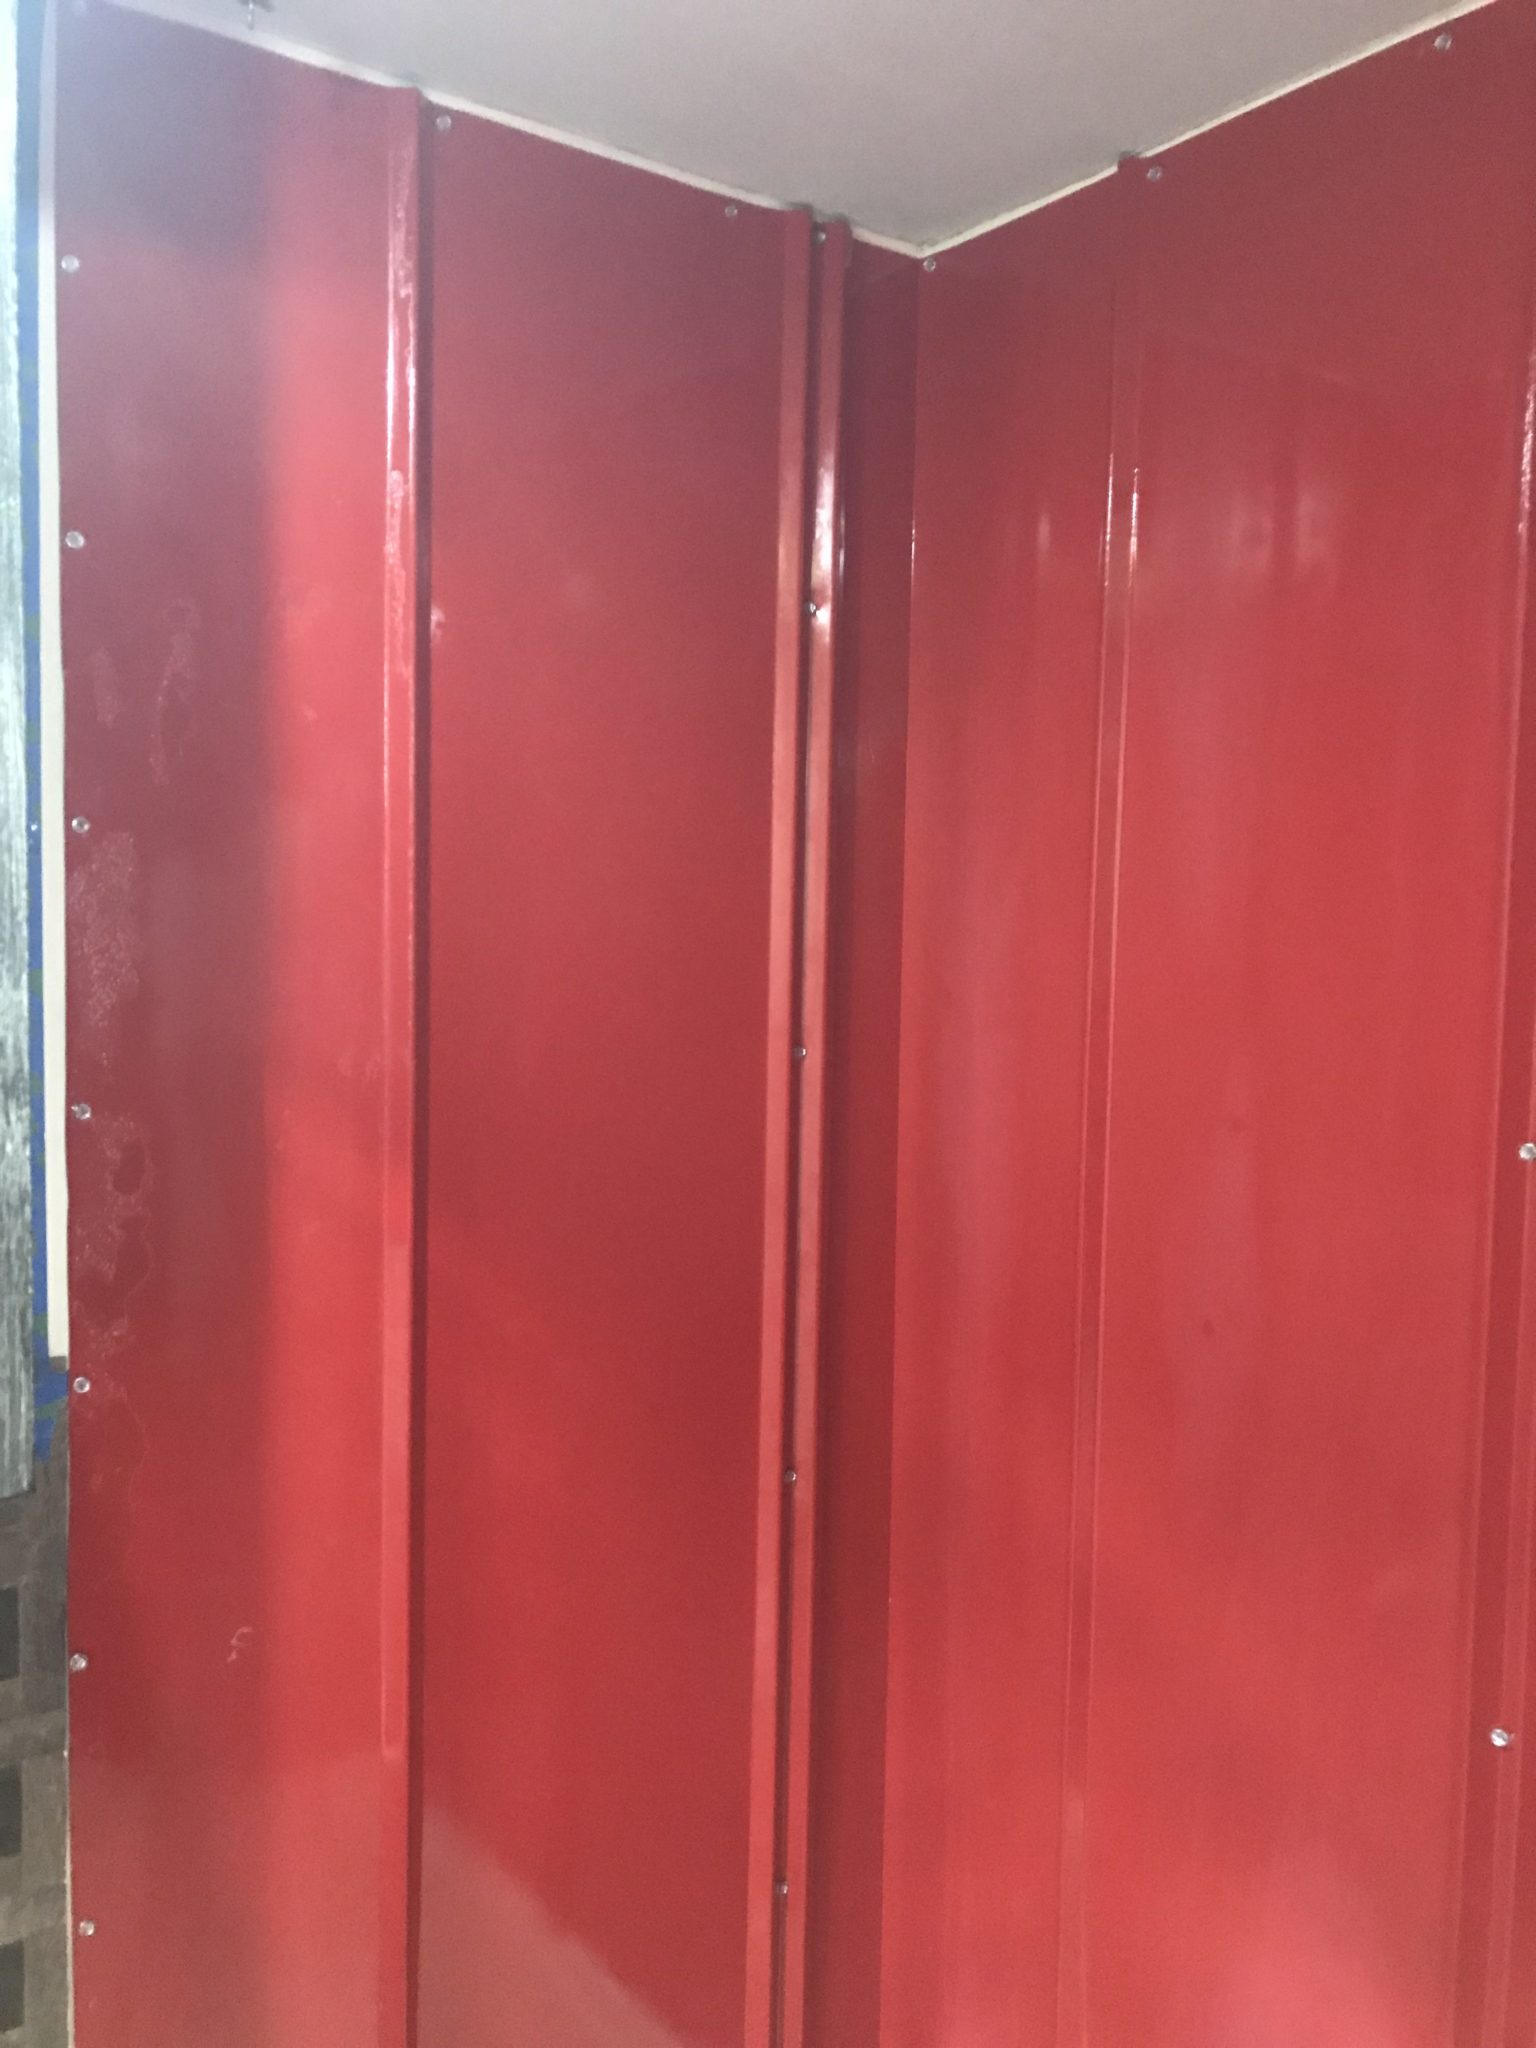
The install went pretty good though. The pieces that had been bent lined up perfectly, I trimmed the front and back pieces, cut out the holes for the faucet, then de-burred all the edges with a small file. To fasten the panels to the wall, I used hex head sheet metal screws with a little bit of silicone applied to the threads and 3M Hi-Strength 90 spray adhesive to hold the panels tight against the wall. I sprayed the back side of the panel and held it in place against the wall. Then, starting at the bottom, I worked my way up the panel, evenly spacing the screws. I spaced out the outside edges and the top and bottom screws closer than I did at the joints in between. It all went together easily and shower walls came out looking great!


The Shower Walls Completed

Please Like and Share us on social media! Also, subscribe to our email list to stay up to date on new posts! Please leave a comment telling us what you think.

Great job, the shower is looks fantastic! We’re thinking of doing the same thing and I’m so very curious how the red paint is holding up under the constant barrage of water from the shower?
Thank you,
So far the paint has held up perfectly. We’ve been fulltiming a year now in it and have had no problems with the shower.
It’s a great idea and looks really good! My question is is it possible to install over cement block walls. How wld u fasten it?
Sure you could install over concrete walls. You just need to used concrete screws to attach it.
I know this is an older post, but hopefully you’re still monitoring it. I am getting ready to do this in my tiny home. I was wondering what was behind the metal? Cement board? Did you use Red Guard? Thanks for any help.
Thank you for your question!
Behind the metal is just the RV wall paneling. It’s a 1/8″ wood panel with wallpaper material on it. The only thing I used was some 3M Hi-Strength spray adhesive on the back and the screws with some silicone on them. If I were to do it again I would completely cover the back of the metal with adhesive and seal all the edges and overlaps with silicone.
Thanks for the quick reply. Was condensation behind the metal an issue?
Not that I was ever aware of. But, we sold the trailer just over a year ago.
Wondering how to cut the hole for the shower control….
I used a hole saw. Cutting metal is not very good for them, but sheet metal cuts pretty easily.
HI- Im installing roofing iron – thats flat all over Im butting down onto a tile upstand – what did you seal the bottom edge with? I cant see from the photos – was it just a bead of silicone?
I didn’t seal the bottom edge. My thinking was to let any moisture that may be back there a way to escape. I can’t say for sure if that was the right thing to do or not.
Thanks Ill let you know how I go with it
stay safe
Great post definitely have been looking for someone else that has done this I’m looking to fix up my Winnebago. And just don’t know where to go with the bathroom I wish you guys would have posts and after picture of the entire bathroom would love to see it. Thanks
Hello, I’m in the process of doing the same thing , I had my drain trap freeze in the winter and broke off, and the biggest problem was there was not one area to look in to fix it , no access panels at all, so i removed the shoer surround and has to ripped it apart of course ! then lifted the shower basin , and found a area to install a access hole, anyway, I’m using the other type of siding the galvanized sheets with more corrugation? the reason is I have 2 bends in my shower and the ones you have will not bend so easy! Im starting the walls tomorrow.I did notice at Home depot they have brown and a white corrugated like yours. The white looked awesome. no painting