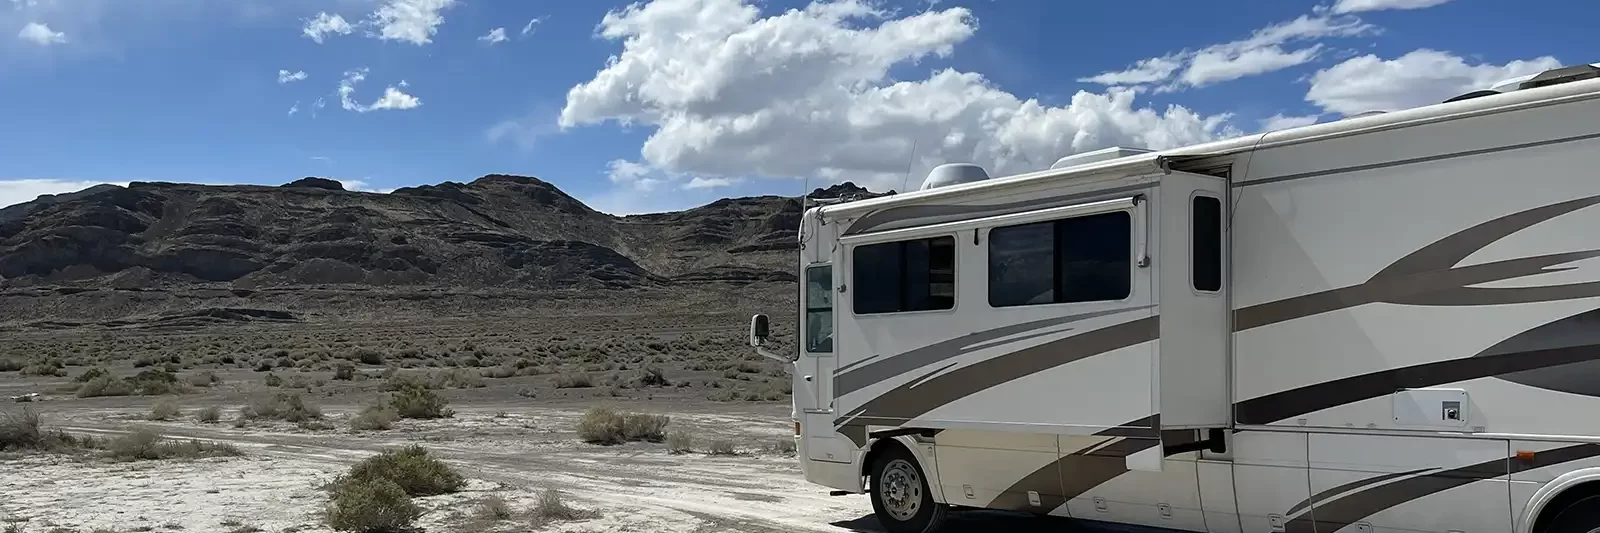
Are you pushing the limits or maybe exceeding your RV weight rating? Or, does your RV have a set of Nev-R-Lube axles that you would like to get rid of? If something like that is the case. You can easily swap out or upgrade your RV axles yourself.
Recently we upgraded the leaf springs and suspension on our RV, The Tin Can. I tell about in my post, Keeping An Eye On RV Wheels And Tires. We have since made a short trip and had a wheel mishap. Now it was time to finish our upgrade with heavier rated axles and wheels.
The Axle Upgrade
As I mentioned in my other post, our axles were rated at 3,500lbs each. The suspension upgrades we are performing are raising our rating to over 5,000lbs per axle. For this final part of this upgrade I, with the help of some Full Time Families friends, we will be installing new axles and wheels.
The Gang Assembled
It was the week after our Full Time Families, Family Reunion rally in FL. There were still quite a few families hanging around the park. This made it the perfect time to do a project like this. Can this be done by one person? Absolutely, I did the leaf spring upgrade by myself. It was a harder job than this one. But does having more hands to pitch in help? That would be a big YES! So, our friends Bill, Sean, Chris, and David all pitched in where they could. This was going to be an easy job.
The Parts List
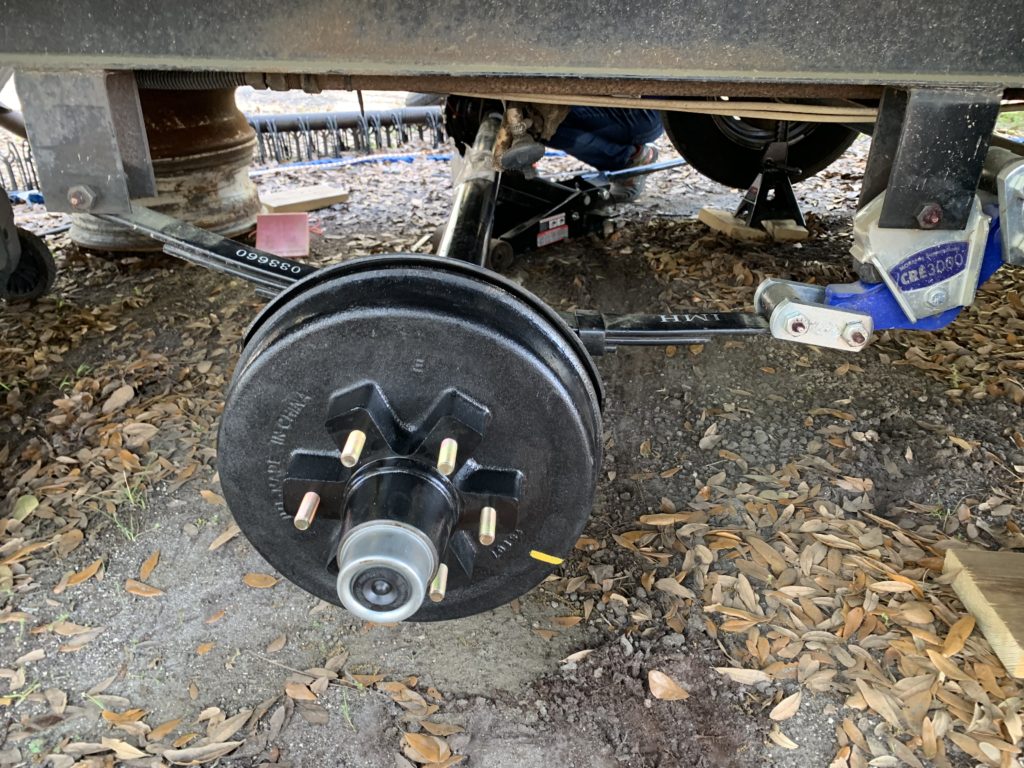
For the axle replacement job the parts list is: 2 Rockwell 5,200lb, 6 lug axles with brakes. 5, 6 lug, 15 X 6 steel trailer wheels, and a set of 4 Goodyear Endurance, E rated, ST225/75R15 tires. This setup will easily handle my RV weight. Yes I did just list 5 wheels and only 4 tires. The pervious Carlisle, Radial Trail, D rated, ST205/75R15s we’re only a year old. No they do not have near the load rating of the new tires. But one of them will be good enough for a spare. So I had the tire from my damaged wheel mounted to one of the new rims to ride as a spare.
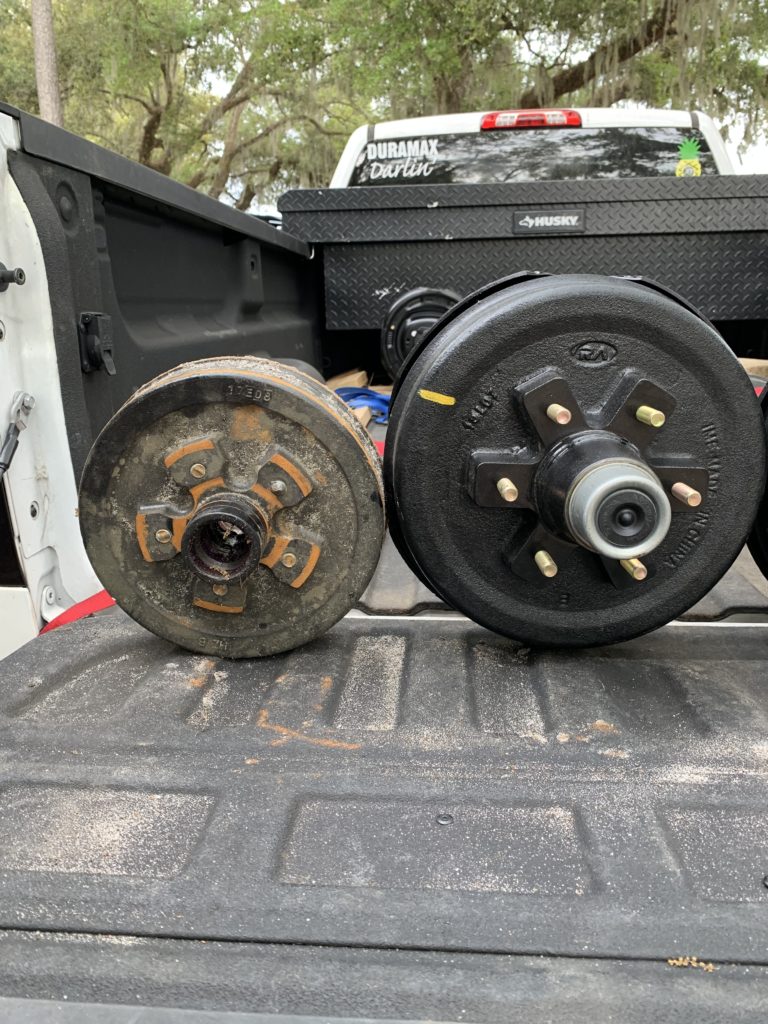
On top of the added weight rating of the 5,200lb axles. You also get the benefit of bigger brakes. The 5,200lb axles have 12″ x 2″ brakes while the 3,500lbs are 10″ x 2.25″.
My Advice On Axle Purchasing
The axles can be ordered easily online. There are many websites where you can plug in your measurements and order away. One thing I noticed on several sites, is that many of the axles are for bottom mounted leaf springs. Our trailer has top mounted. I also thought delivery might be awkward being we were at a
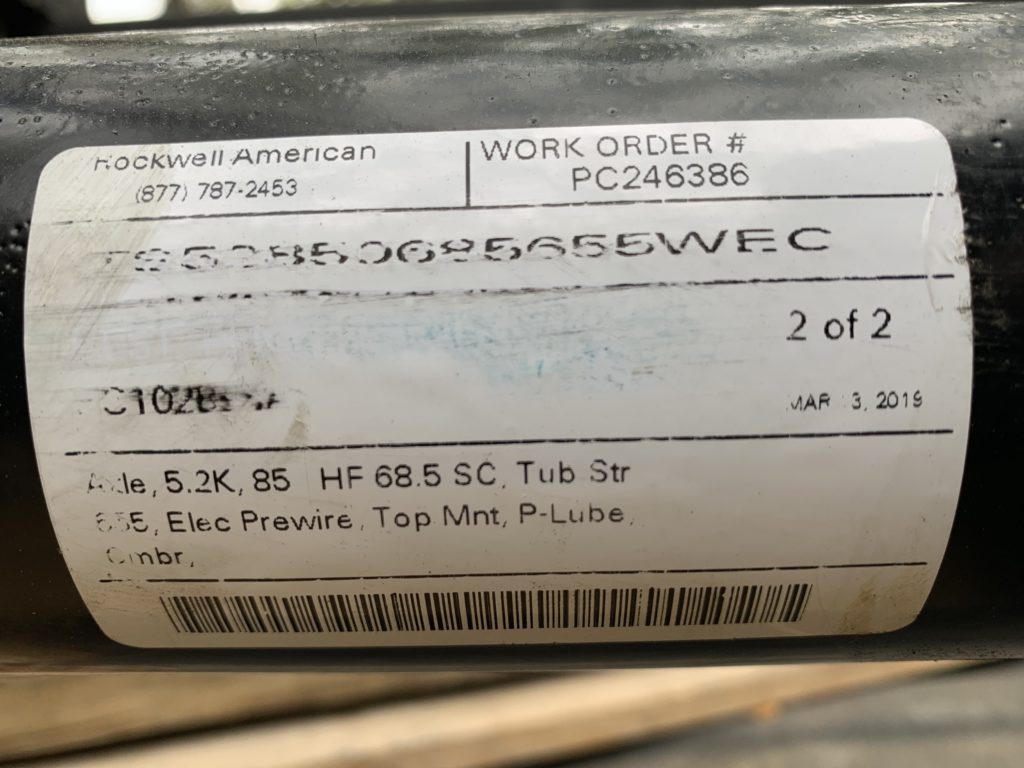
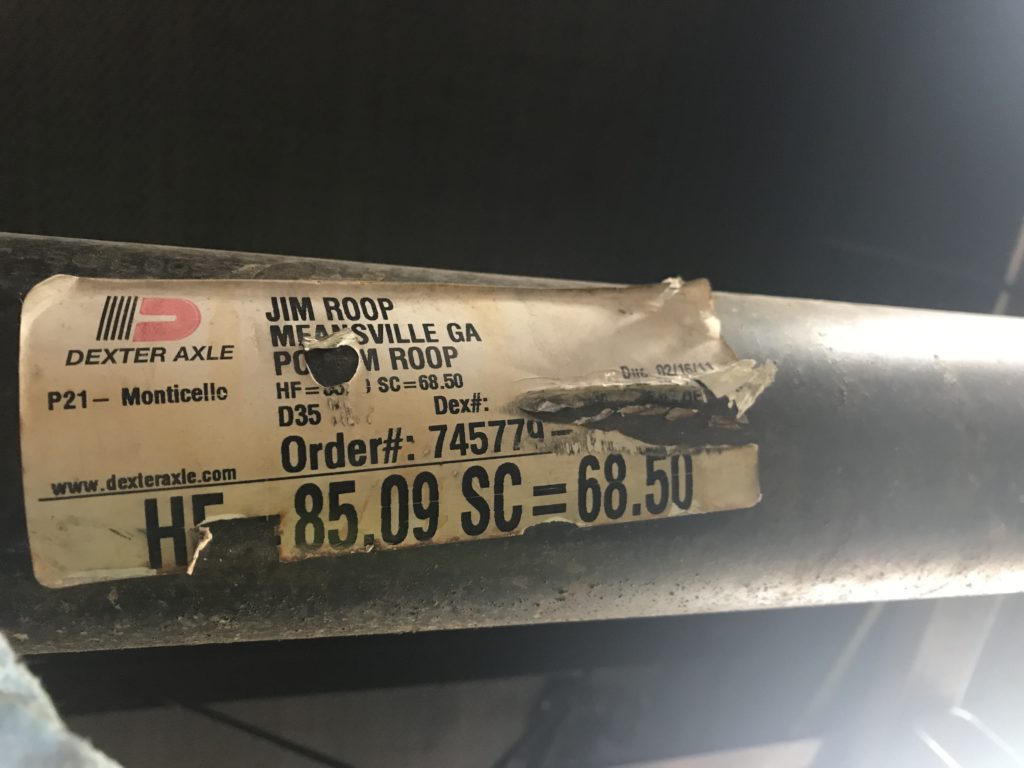
The gentleman at the local trailer shop was very helpful and knew exactly how to get the correct axles ordered and on the way. I may not have gotten as good of a price as I may have gotten online. But I think I got a pretty good price. The piece of mind by knowing I was getting the correct axles was worth it. Plus we were helping a local small business! Delivery time for the axles was about 2 weeks, which seems to be fairly common. That is unless you can go directly to an axle manufacturer, which will cost quite a bit more. I was quoted a price of almost $200 per axle more from a manufacturer, but they could have had them done in a few days.
Lift And Support
The axle swap is a very straight forward process. The first part is figuring out which way you are going to support the RV. For my leaf spring swap, I had to lift the trailer off of both axles at once. This can be pretty risky. That is a lot of weight you are having to support. Unless you have some big heavy jack stands or blocks I wouldn’t necessarily recommend it. This time around I did not have access to those pieces of logs I had previously, or big enough jack stands. Instead, we chose to lift and support the RV one axle at a time. This way may have taken a little longer, but we all felt it was safer.
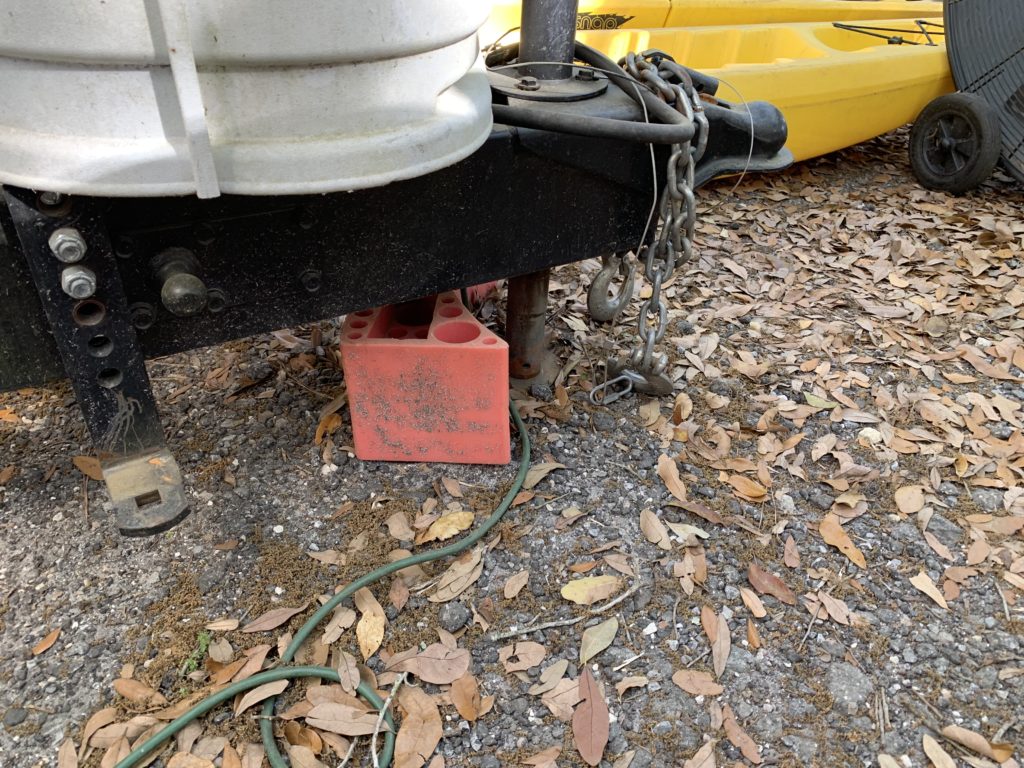
Be careful jacking up a trailer though. We were using a floor jack on the dirt. This prevented the jack’s wheels from being able to roll while lifting the RV. So, instead of the jack moving, the trailer was. None of us realized this at the time, and while lifting the trailer, it pushed the tongue jack off its block. Fortunately, no one was under or even very near the trailer. Thankfully no one or the trailer
Out With The Old
Now that we had The Tin Can safely
In With The New
Installing the new axles was pretty much just reverse order of removing them. One thing to look out for though. We initially messed up on installing the second axle. The axles are hopefully marked left and right on the brake backing plates. Be sure to have these labels on the correct side of the trailer. Drum brakes, anyway, have a front and back shoe and also the way the mechanism works, makes it important to install them on the correct side. Luckily I found this mistake before we got too far along with installing that axle.
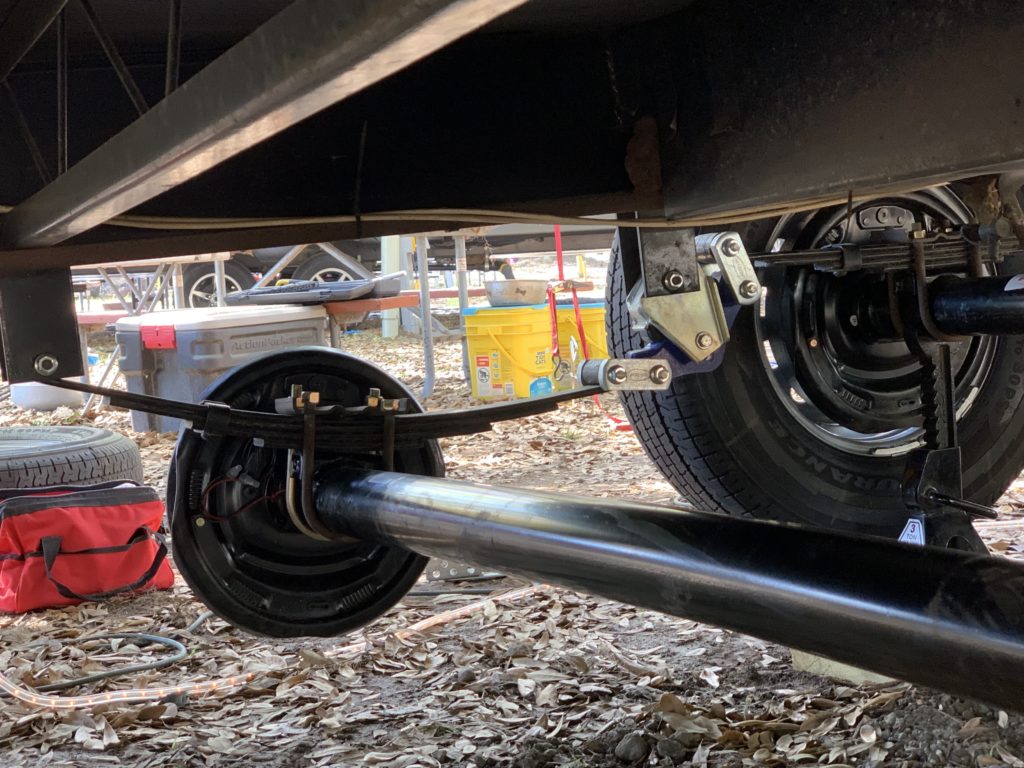

Other than making sure the ends are on the correct side. It’s just making good wire connections for the brakes and torquing the u-bolts and lugs properly. Thank you, Sean and your torque wrench!
Conclusion
With the help of my friends, this job was fun and easy. Our RV community is great! When someone is around, they are always willing to help any way they can. This axle and suspension upgrade given us a big piece of mind pulling The Tin Can down the highways! Our axles can now easily handle our RV weight issue.
Important Update!
Since this post, we have had to replace the cheap wheels from Amazon. On 2 separate trips, a wheel cracked and leaked air. You can read about it in the
Please Like and Share us on social media! Also, subscribe to our email list to stay up to date on new posts! Please leave a comment telling us what you think.
