• Home
  • Our Rig
  • Resources
  • Menu
  • Skip to right header navigation
  • Skip to main content
  • Skip to secondary navigation
  • Skip to primary sidebar

Pineapple Voyage

Follow us as we share our adventures RVing around the country in our “tin can”!

  • Home
  • Our Rig
  • Resources
RV at Bonneville

Swapping Out An RV Oven – Part 2

July 23, 2018 By //  by Philip 6 Comments

Share
Pin50
Tweet
50 Shares

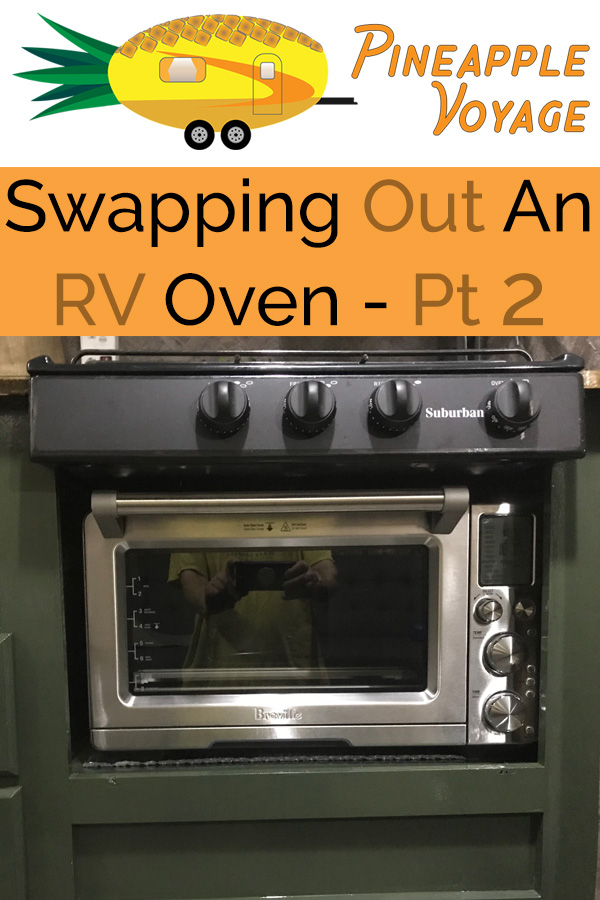
With our old gas RV oven removed, we can now proceed with installing our
Breville Smart Oven Air. In my previous post, Swapping Out An RV Oven – Part 1, I explained how I removed our old RV oven while keeping the stove-top. Now I will tell how I went about installing the new electric one

Breville Oven
Breville Oven

Preparing The Cabinet

The first thing we did was paint the cabinet hole, left by the old oven, to match the rest of the cabinet. Angelic jumped right on this task and had it knocked out in no time. After the paint dried, I took my drill and a hole saw and made a hole in the back corner to fit the cord through.

An Experimental Test

These electric ovens are designed to be used on a counter-top and not within the confines of a cabinet. Before placing the oven inside the cabinet, I did a little test with it. I set the oven on the counter-top and turned it on its highest setting. With the oven up to temperature, I lightly touched the side of it. It was pretty hot to the touch. Though holding my hand an inch or so away from it, the air was just a little warm.

RV oven swap part 2 Pinterest

Let’s Insulate This

Now, with the results of my test, I chose to line the cabinet hole with Reflectix insulation. This should help keep the cabinet paneling from getting too hot. I do know that Reflectix isn’t made for high contact heat, but the oven will not be touching it, I believe with the airspace everything should be fine.

Placing The Oven In The Cabinet

The cabinet was now ready for the oven to be placed in its hole. After a minute or so trying, I found that the oven could be lowered in place at an angle through the stove-top opening. Now it was time to move on to the electrical side of the project. This called for a trip to our favorite home/RV improvement center was in store. We picked up a few feet of 12/2 with ground romex wire, a weatherproof electrical box, a GFCI receptacle, and cover were purchased to do the job.

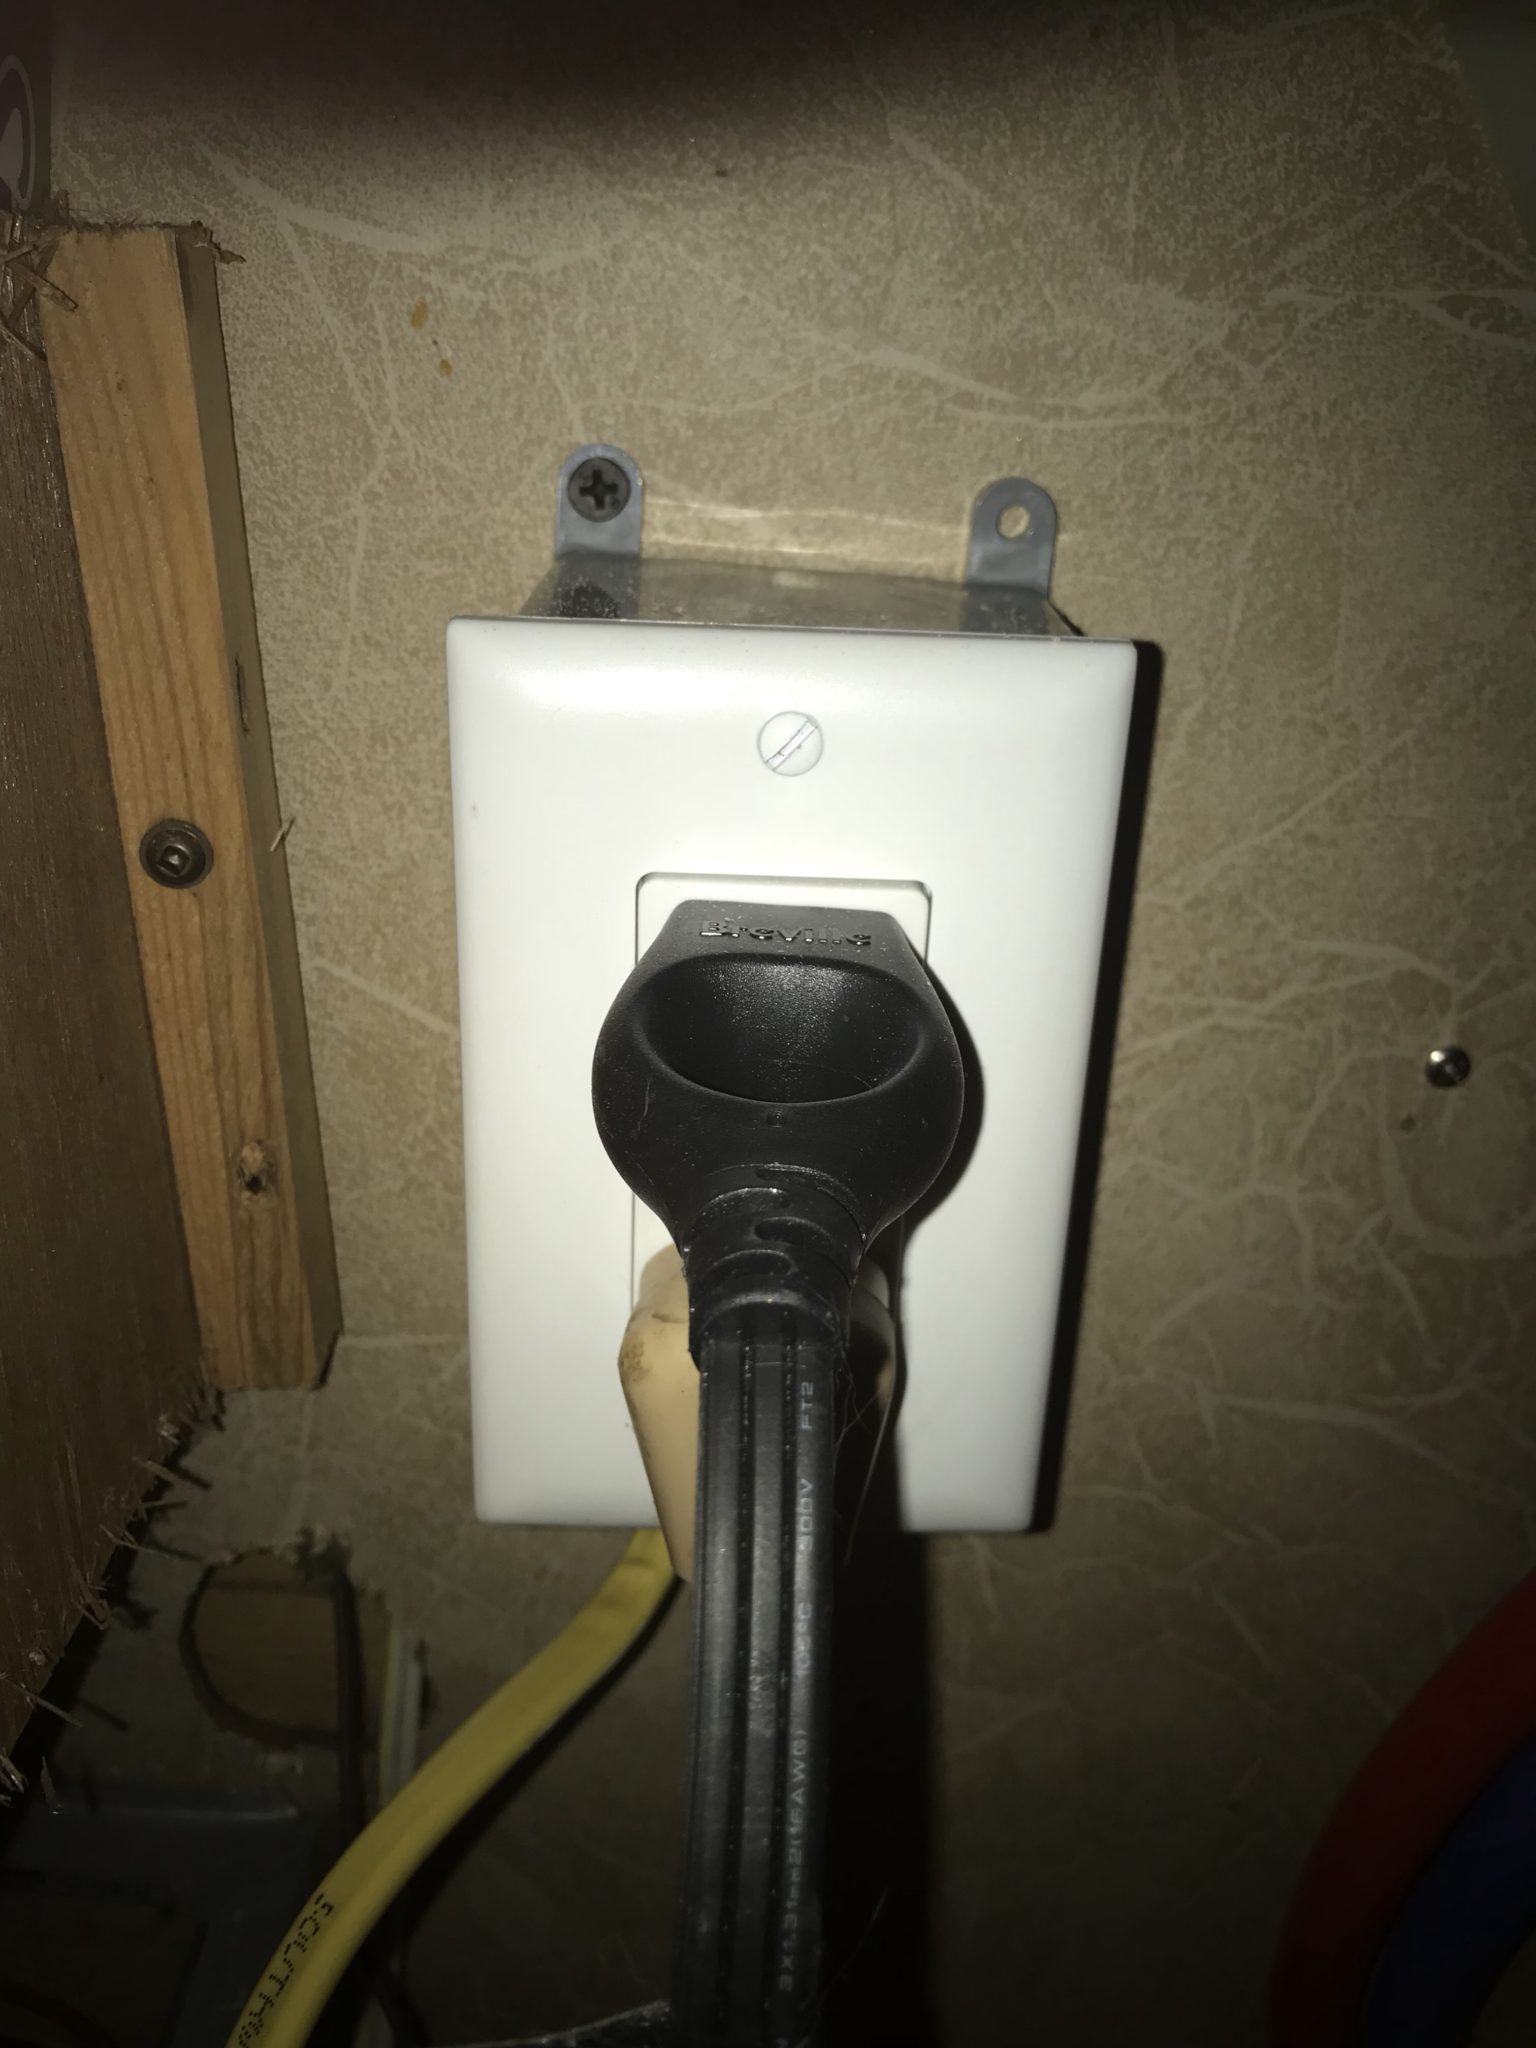
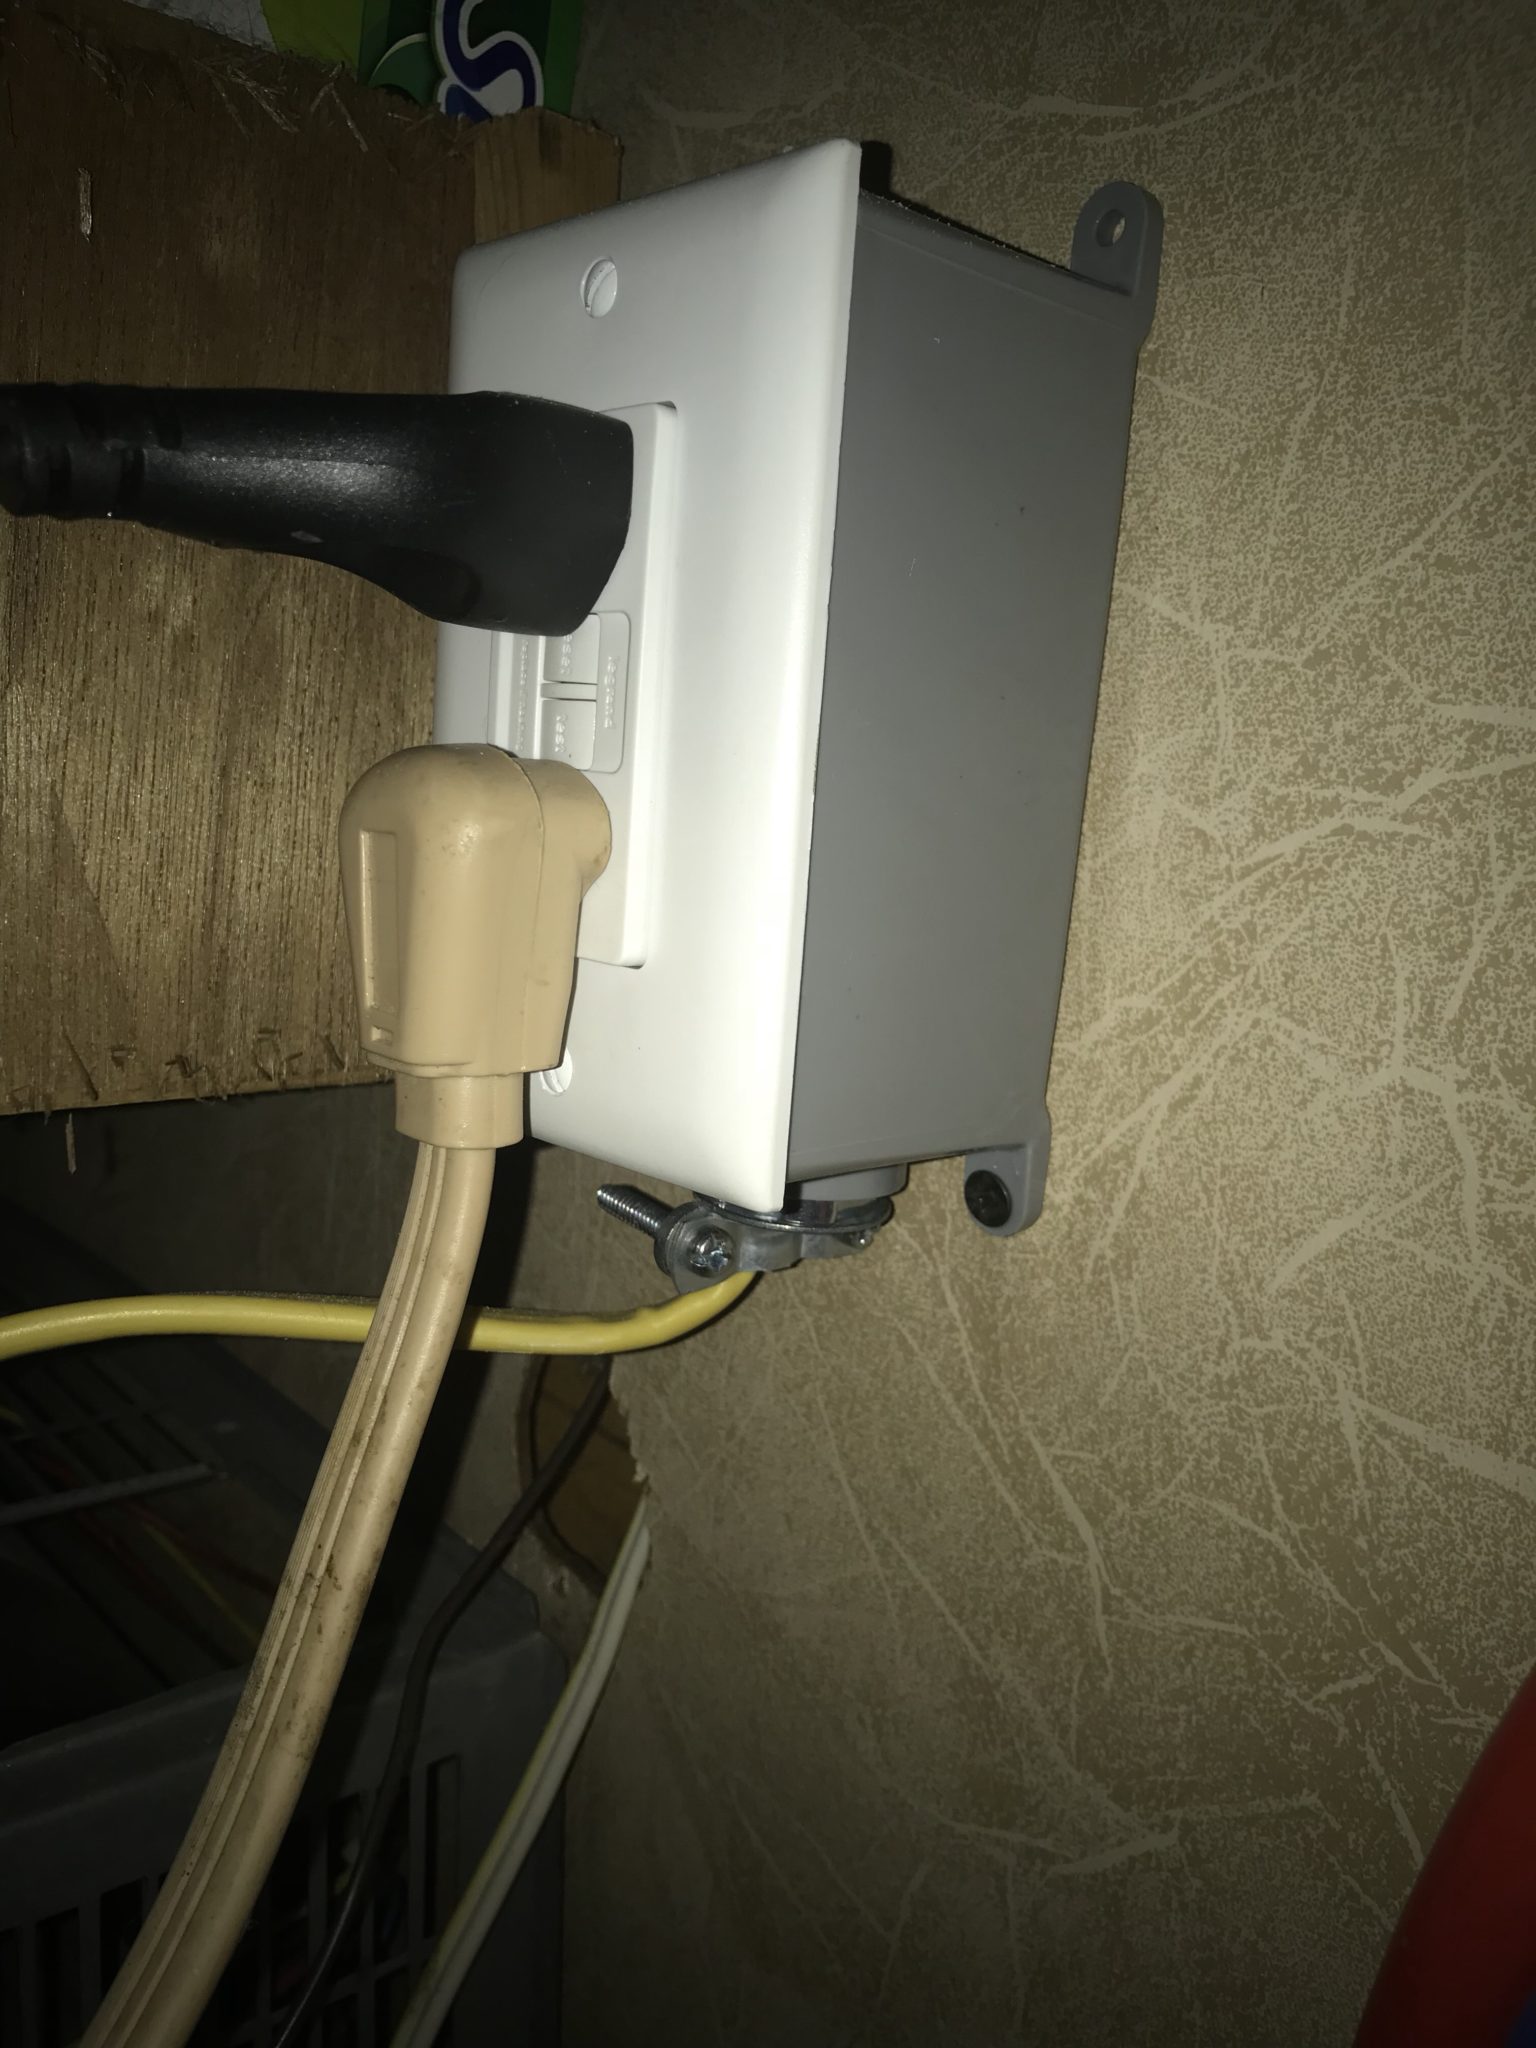
Wireing The New RV Oven

Before we start, remember, I am not an electrician, so you may want to consult with a certified electrician before following the advice in my tutorial. With that, first thing to do was disconnect the RV from shore power! First thing I did was run one end of the romex into the box and install the GFCI outlet in it, making sure to connect the correct wires to the terminals. Then I attached the box to the wall underneath the cabinet. The other end of the romex was run down the underside of the cabinet to the breaker box.

  • Front view of oven outlet
    Front view of oven outlet
  • Side view of oven outlet
    Side view of oven outlet

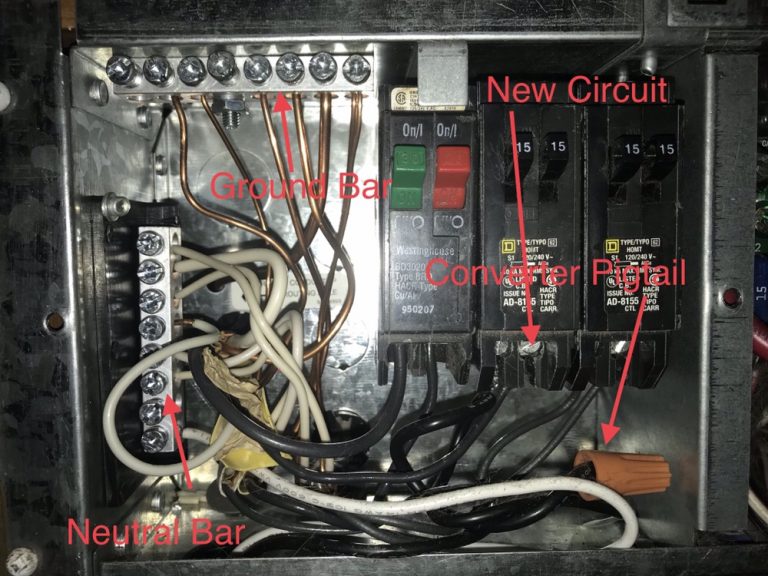
A Little Reconfiguring

Unfortunately, the RV manufacturer didn’t leave us a spare circuit breaker to wire our new oven to. But after removing the circuit breaker cover I found a little relocating of circuits could be done. The circuit breaker powering the 12-volt converter had a pigtail on it that was not connected to anything. This allowed me to move one of the existing 15-amp electrical circuits from its current breaker to the pigtail mentioned, freeing up a breaker.

Connecting The New Circuit

To connect the new circuit to the box, I stripped back several inches of the romex covering off, exposing the individual wires. I next stripped off about ½ inch of insulation from the black and white wires and removed the paper from the bare wire. The bare wire, the ground, was connected to an empty slot on the ground bar. Next, the white wire, the neutral, is connected to the neutral bar. That left the black wire, the hot wire, to be connected to the empty breaker. To connect it to the breaker, it first had to be popped loose from the panel. This was done by rotating the breaker toward the end the wire is connected to until It popped loose
. Then the black wire was easily connected to the breaker and popped back
in. With the circuit breaker cover reinstalled, the shore power was reconnected, and the new oven was plugged into its receptacle.

RV circuit breaker panel
The circuit breaker panel

Enjoying The New Oven

We now have a fantastic little convection RV oven! However, since we have 30-amp service, sometimes we have to turn the A/C off when using the oven to prevent tripping the main breaker. Which is usually only a few minutes.

I hope these two articles, Swapping Out An RV Oven – Part 1, might help someone out in there RV. Thank you for
reading and please leave any feedback you may have. 

Please Like and Share us on social media! Also, subscribe to our email list to stay up to date on new posts! Please leave a comment telling us what you think.

Share
Pin50
Tweet
50 Shares

Category: RV RenovationTag: air, Breville, camper, camping, cooking, design, DIY, food, fryer, full-time, fulltime, hack, kitchen, oven, remodel, remodeling, renovation, renovations, rv, smart, The Tin Can, trailer, traveling

Previous Post: « Swapping Out An RV Oven – Part 1
Next Post: Trippy, Propane Hose Chewing, Squirrels »

Reader Interactions

Comments

  1. Chrissy Bradford

    September 21, 2019 at 12:37 pm

    Hi, I was looking to do something like this on my boat. I was wondering how it was going after a year. Have you had any problems with the cabinet getting hot even with the insulation?

    Reply
    • Philip

      September 21, 2019 at 1:27 pm

      So far, we have had no problem with the cabinet getting hot. Just make sure to have some airspace around it.

      Reply
  2. Sheryl

    March 16, 2022 at 8:31 pm

    We are considering doing this… sealing the small microwave under the propane stove top with a robust convection combo type. I’m concerned about the propane line that runs up the backside of the cabinet.

    Reply
    • Phil

      March 17, 2022 at 4:13 pm

      As long as the new oven does not touch the copper line, I would not worry about it. You could get a longer piece of copper tubing. Then you might be able to route it around the new oven instead of behind it. If it is the heat you are worried about I would be more concerned with the sides and the back wall of the cabinet hole more than the copper tubing. Some heat shielding insulation would probably be a good idea.

      Reply
  3. J Clapper

    February 1, 2025 at 12:20 pm

    We did this too. Lined the cavity with aluminum flashing but left air space in back. We also made a 1″ high drawer for the oven to sit on. That way we could use the oven with it pulled out if we thought it would get too hot. (It doesn’t.) Drilled 2 holes through the front edge of the drawer bottom into cabinet. Two eye bolts through the holes keep the drawer from coming out during travel. That way we don’t depend on the drawer’s latch.
    We were going to get a Breville but were gifted a Ninja Foodi 10-in-1 XL pro for Christmas. Saved us from spending $$$ and it works like a charm.

    Reply

Leave a Reply Cancel reply

Your email address will not be published. Required fields are marked *

Primary Sidebar

This site contains affiliate links. Which means we may receive a commission, at no extra cost to you, if you purchase a product or sign up for a service on this page. The products and services on this site are mentioned because we believe in them and feel that they may be of value to you. 

Subscribe!
Get the latest content first.
Supporting your fulltime RV adventures and aspirations Open Roads Bookkeeping RV Health

Recent Posts

  • Knocking Out The Reno List
  • Not Dead Yet!
  • Repairing A Splendide Washer/Dryer Not Draining
  • Installing Computer Wall Mounts In The RV Motorhome
  • Changing Into Our New RV

Categories

  • About us
  • Blogging
  • Life
  • Organization
  • Recipes
  • Restaurants
  • RV Gadgets & Accessories
  • RV Maintenance
  • RV Renovation
  • Saving Money
  • Travels
  • Work

Archives

  • January 2024
  • August 2023
  • December 2019
  • November 2019
  • October 2019
  • September 2019
  • August 2019
  • July 2019
  • June 2019
  • May 2019
  • April 2019
  • March 2019
  • February 2019
  • January 2019
  • December 2018
  • November 2018
  • October 2018
  • September 2018
  • August 2018
  • July 2018
  • June 2018
  • May 2018
  • April 2018
  • March 2018
  • Home
  • Our Rig
  • Resources

Site Footer

Privacy Policy
Terms and Conditions

Copyright © 2025 · Mai Lifestyle Pro On Genesis Framework · WordPress · Log in