Installing new flooring in The Tin Can
Choosing the right RV flooring is probably one of the biggest decisions you make. It’s one of the first things you see when you walk in. You want it to look good, but you don’t necessarily want to break the bank. It also needs to stand-up to your conditions.
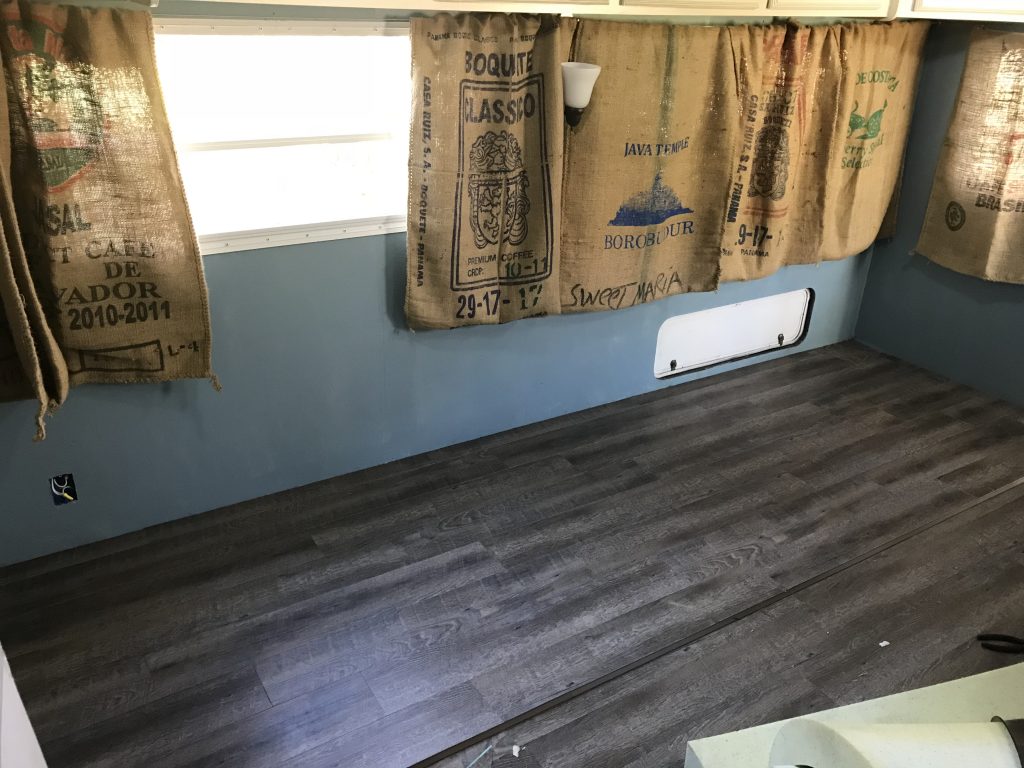
From the start of our renovation, we knew we wanted vinyl wood plank flooring. You get the look of wood but the easy install and cleanup of vinyl. This is especially important when you have pets. Plus, in the RV, you want to keep weight in mind. I’ve seen a lot of people use floating vinyl planks in their RVs, but we liked the idea of peel and stick. It seemed like on top of being easy to install, that it would also be easier to repair in the case a plank got damaged.
Picking The Right RV Flooring
One drawback is that there are not as many color choices with the peel and stick. The color palette we put together, which is another story in itself, seemed to beg for a gray colored flooring. So a trip to our favorite home/RV improvement store was in order. You can look at stuff online all day long, but there is nothing like actually being able to see it in person. Like I mentioned earlier, there were only a handful of the choices in-house. Luckily, we found one that we really liked. It’s the Style Selections 6-in x 36-in Driftwood/Gray Peel-And-Stick Residential Vinyl Plank. It has the grey tint that we were looking for, a nice wood grain and was available in 4 and 6-inch-wide planks. We decided on the 6-inch planks, we liked the look of the wider plank and it fit into the other plans Angelica had up her sleeve.
Pulling Up The Old Flooring
Before we could install the new RV flooring, the old stuff would have to be ripped out first, of course. We started with the old carpet. On the main floor, I pried up on one corner with a nail puller, just enough to grab ahold of. Then I was able to pull it out in one piece. Leaving behind about a bazillion staples in the floor and a mountain of dust. I was able to pull most of the staples out with a screwdriver and a pair of channel-lock pliers. There were a few that I just drove the rest of the way into the subfloor though. For the slide floor, I had to cut the carpet along the edge of the walls with a knife. This was more difficult due to the fact that I didn’t have the proper cutting tool. I just had a half-dull pocket knife, I’m not very good at sharpening knives. Why go buy the proper tool when you can just work with what you have, right?
At first, I had planned to leave the old vinyl flooring in place and install the new stuff on top of it. After further thought though, we figured that it would be best to pull the old vinyl out. Again, this really comes down to a weight issue. You have to take out as much weight as possible to justify putting new weight in to it. The vinyl removal was a little harder than the carpet. It had to be cut out along all the walls and cabinets, again with my not-so-sharp knife. It also didn’t want to come out in one piece like the carpet did. We still believe it was the best decision and are glad we did it.
Installing On The Main Floor
The install began by first measuring the main floor the full width of the trailer. We wanted to see how the plank widths would work out. Whether or not we would end up with a narrow plank on one side and full-width plank on the other side. In the end, we just started with a full plank at the base of the kitchen cabinet. It came out that we only had to trim a small amount off the side where the doorway is. Though we did end up with a somewhat narrower plank on the other side of the floor, but not too narrow.
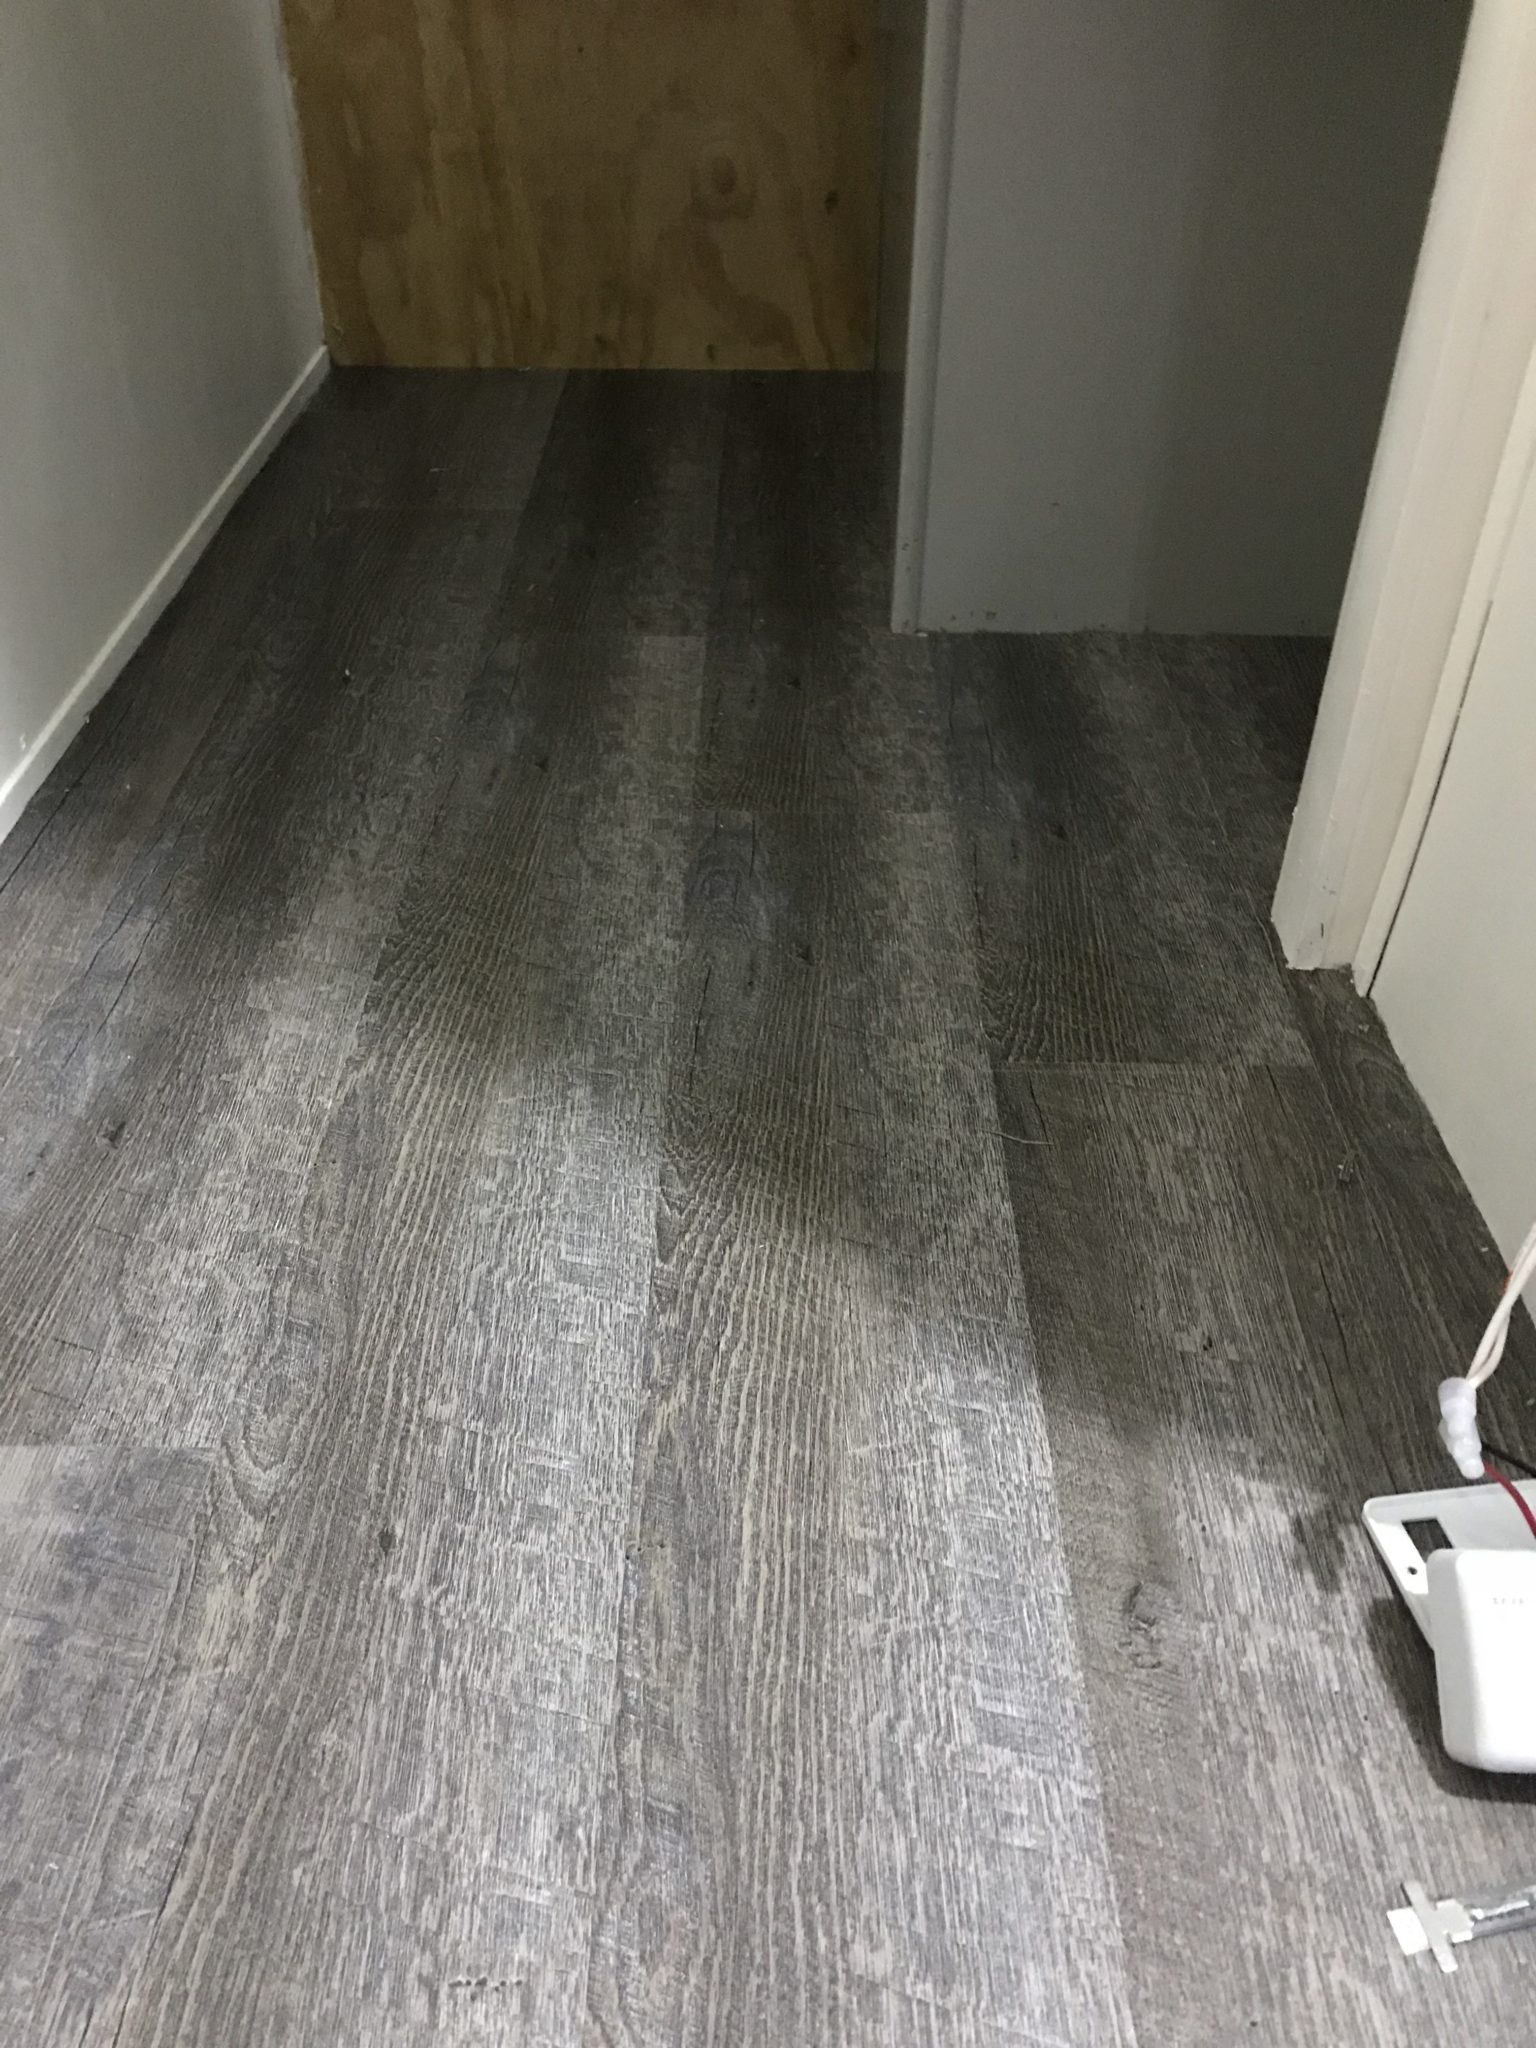
The RV flooring install went pretty smoothly. Even though the planks are peel and stick, we applied some 3M Hi Strength 90 spray adhesive to the back of each plank. You have to try and make sure that you fit the planks tightly together. If you end up leaving even a tiny gap on one, it will continue to plague you all the way across the floor. The first night we actually pulled up several planks and re-laid them. It also turned out that we had to taper the width of the planks along every wall and cabinet base. It’s not a big deal and you really don’t notice it. We also staggered the joints of the planks. Starting the first row with 1/3 of a plank then the next row with 2/3 and the 3rd row with a full. Then started over with the next row.
Slide Transition
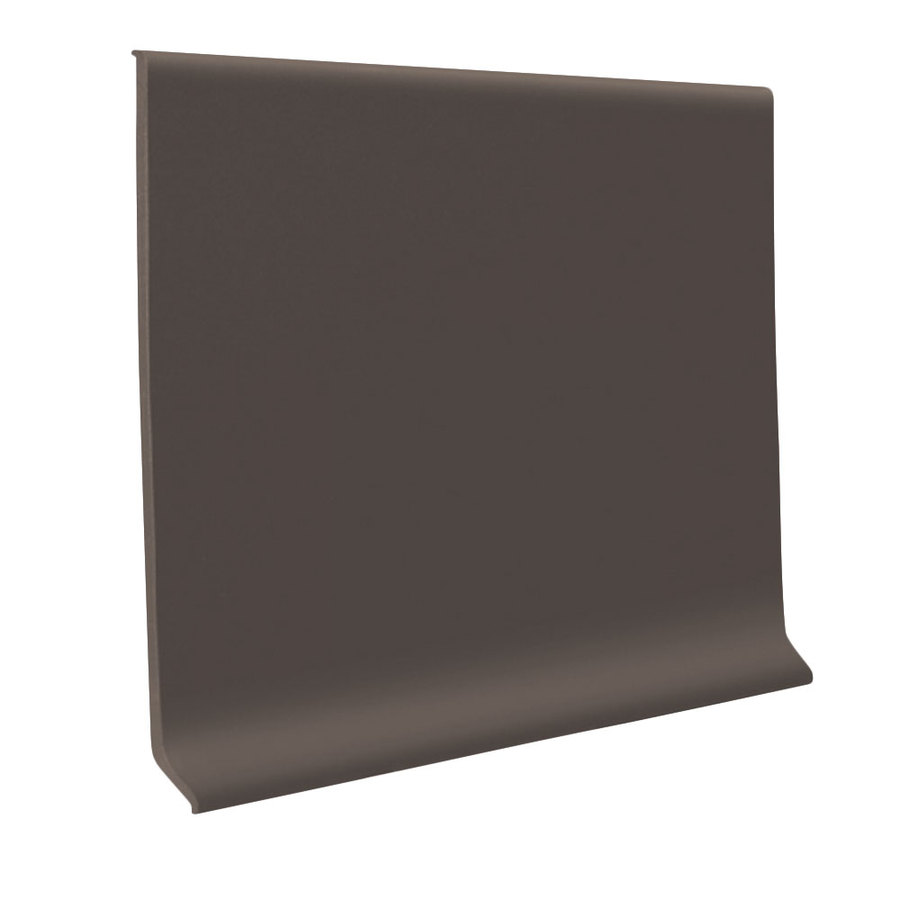
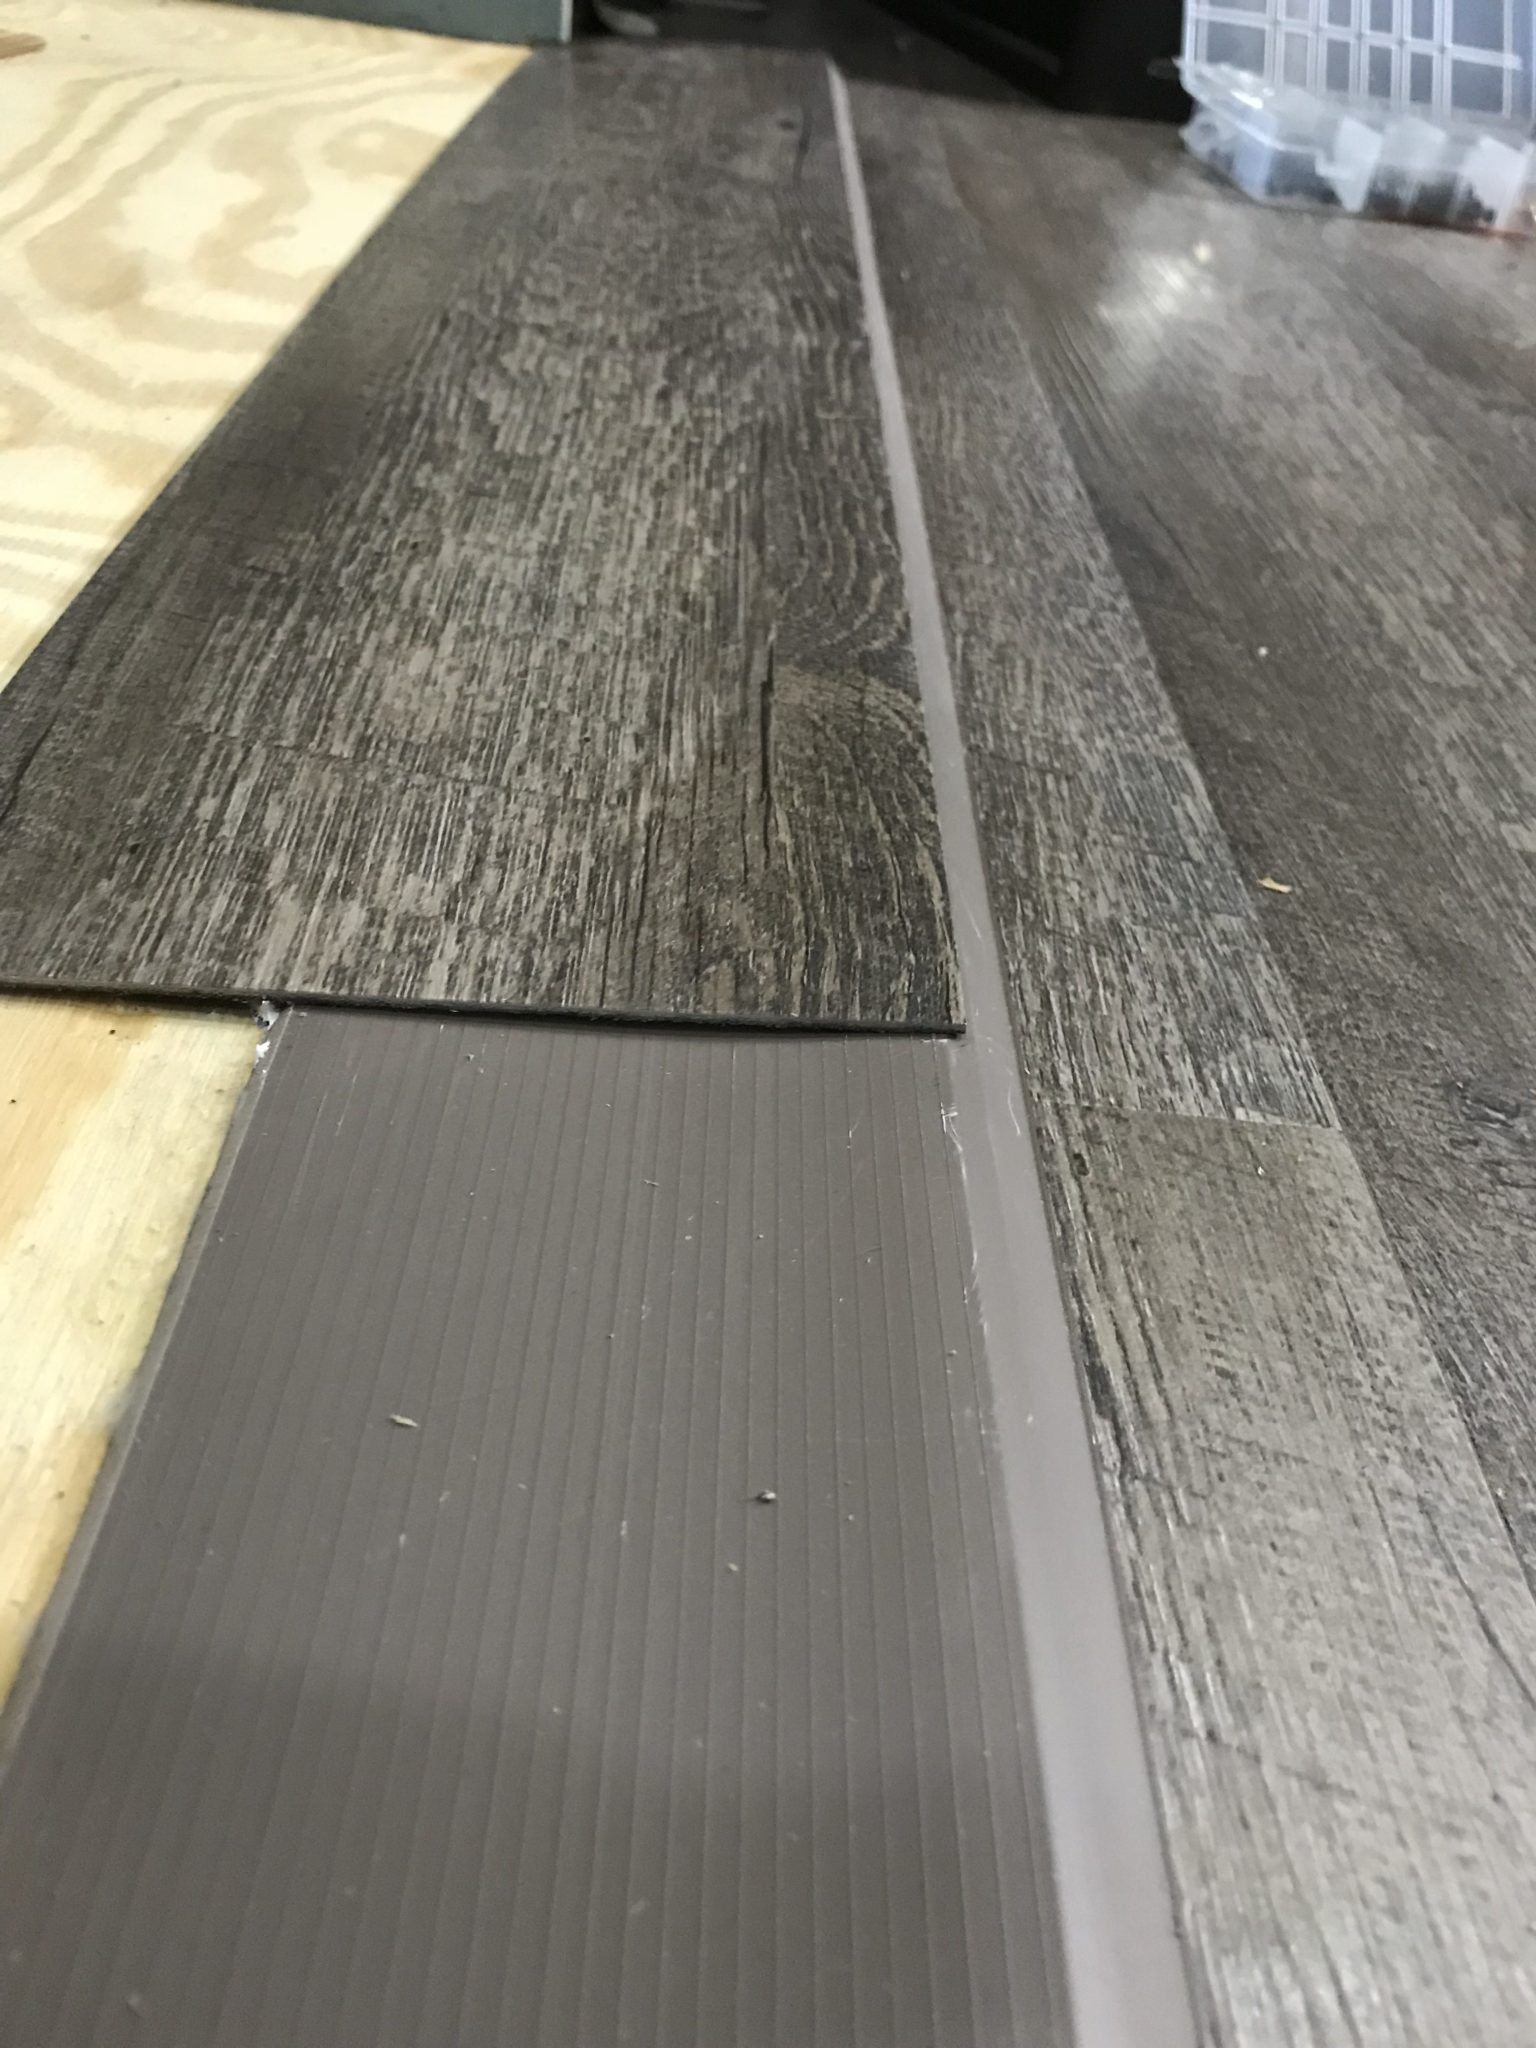
On the slide, we started at the front with our transition. I was inspired by a photo I saw online. A person had covered their transition with a plastic or rubber strip attached to the slide floor and extended over onto the main floor. It looked pretty good, but I also thought that it stood out pretty bad at the same time. With this inspiration in mind I found some brown thermoplastic rubber baseboard strips and thought they would do a good job.
Fitting It Together
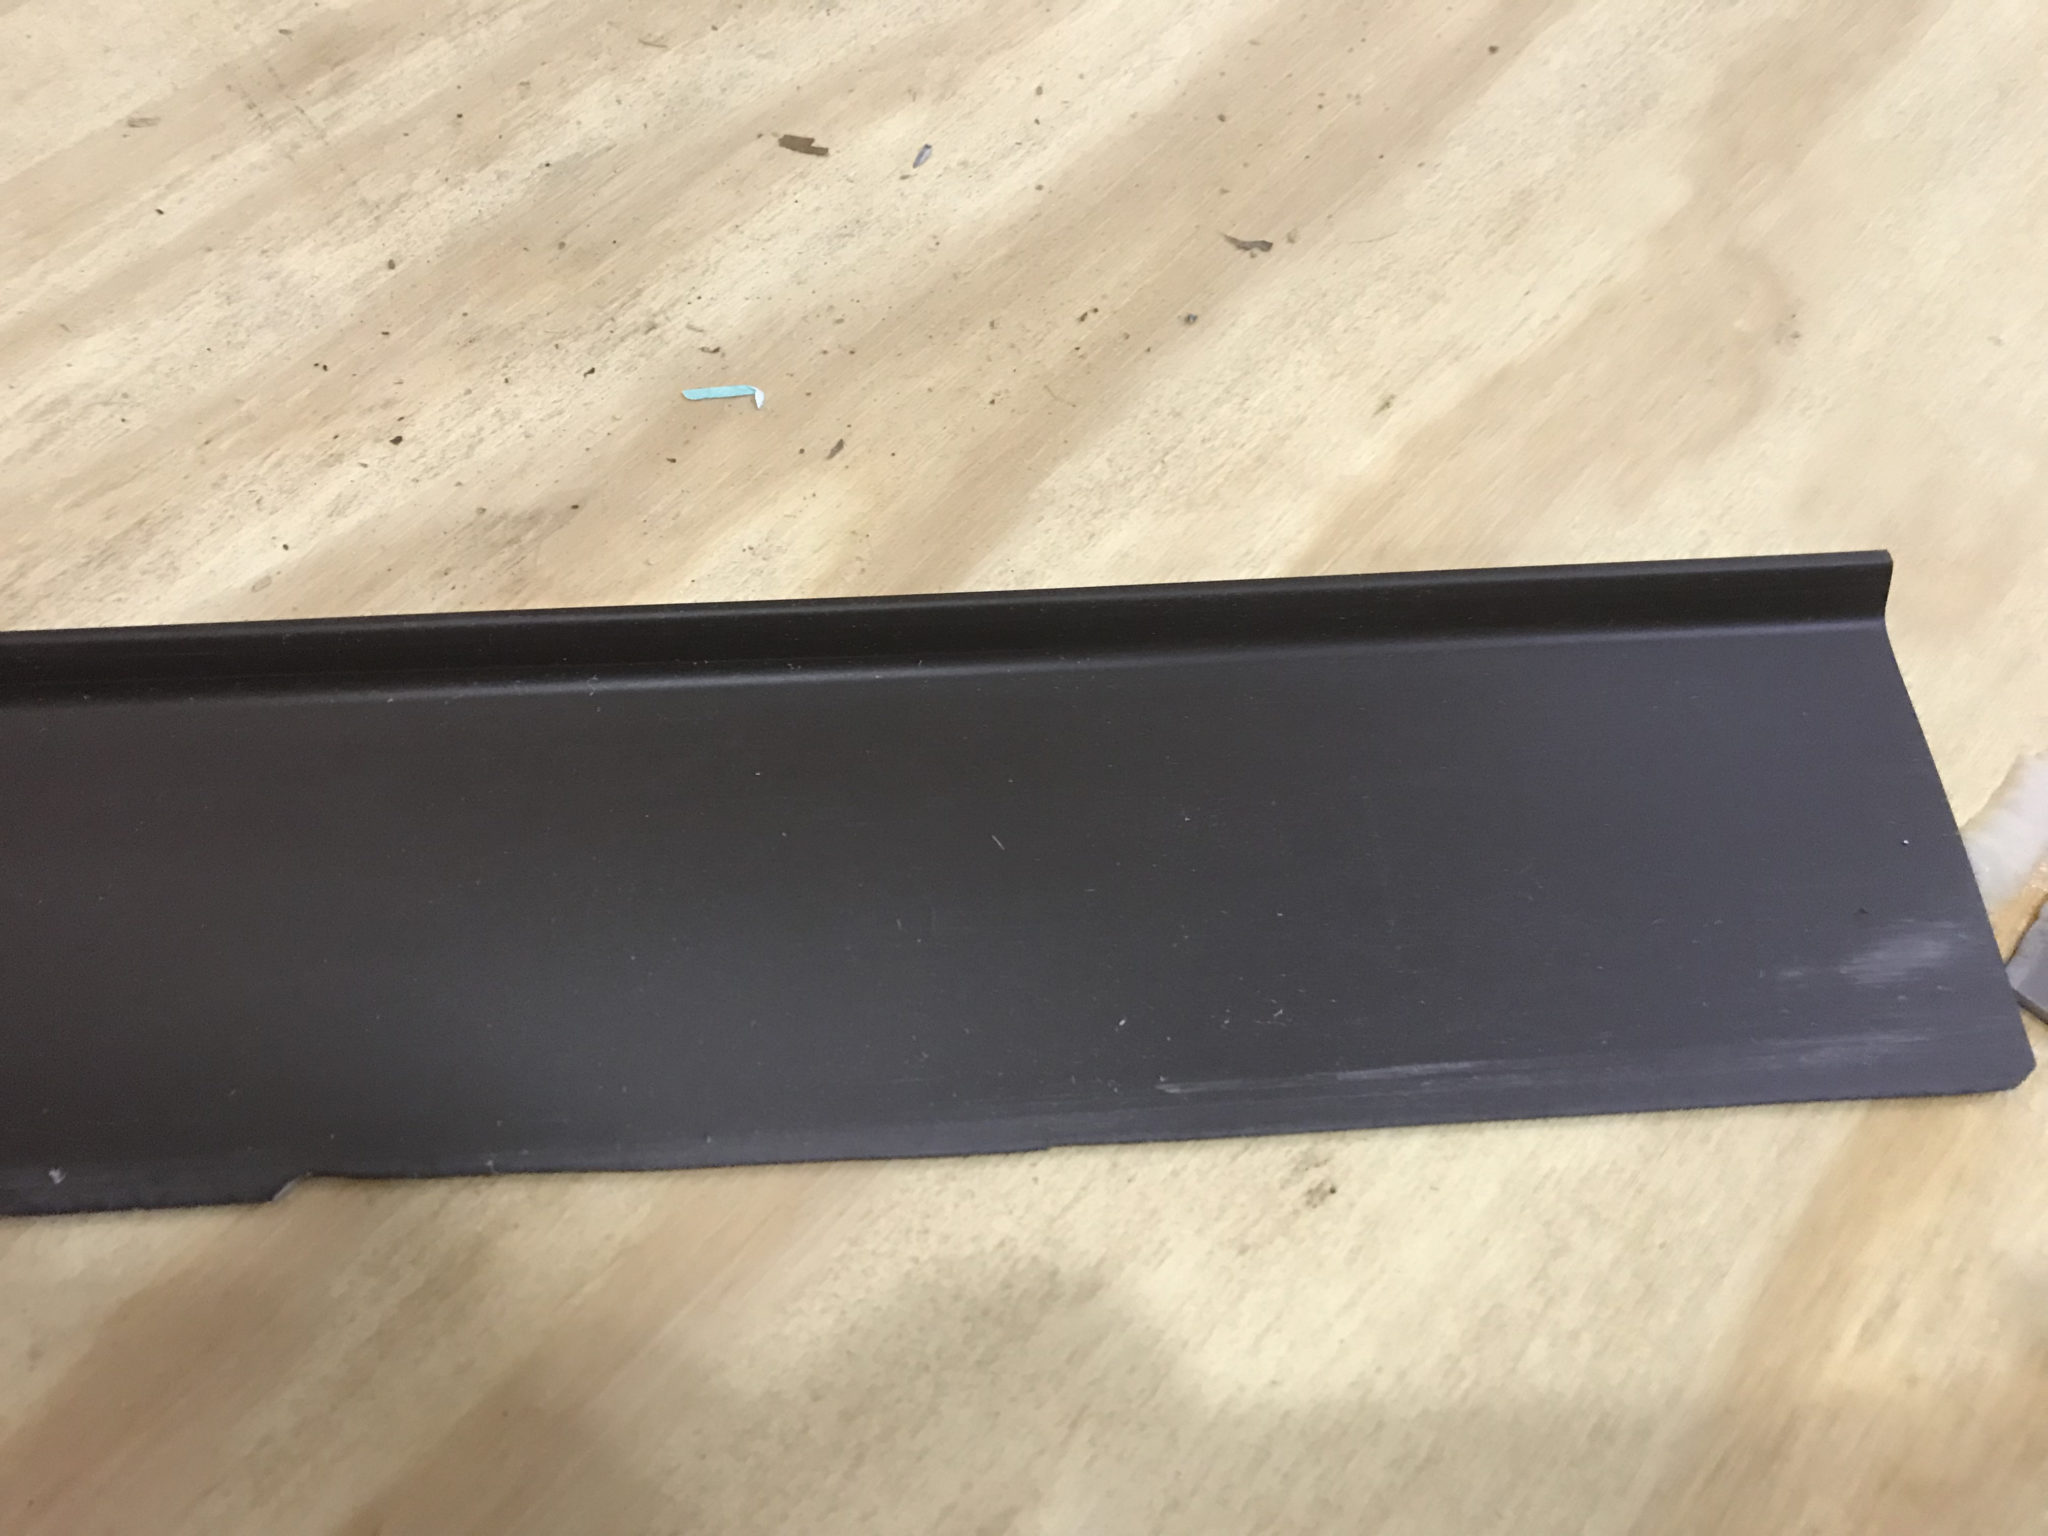
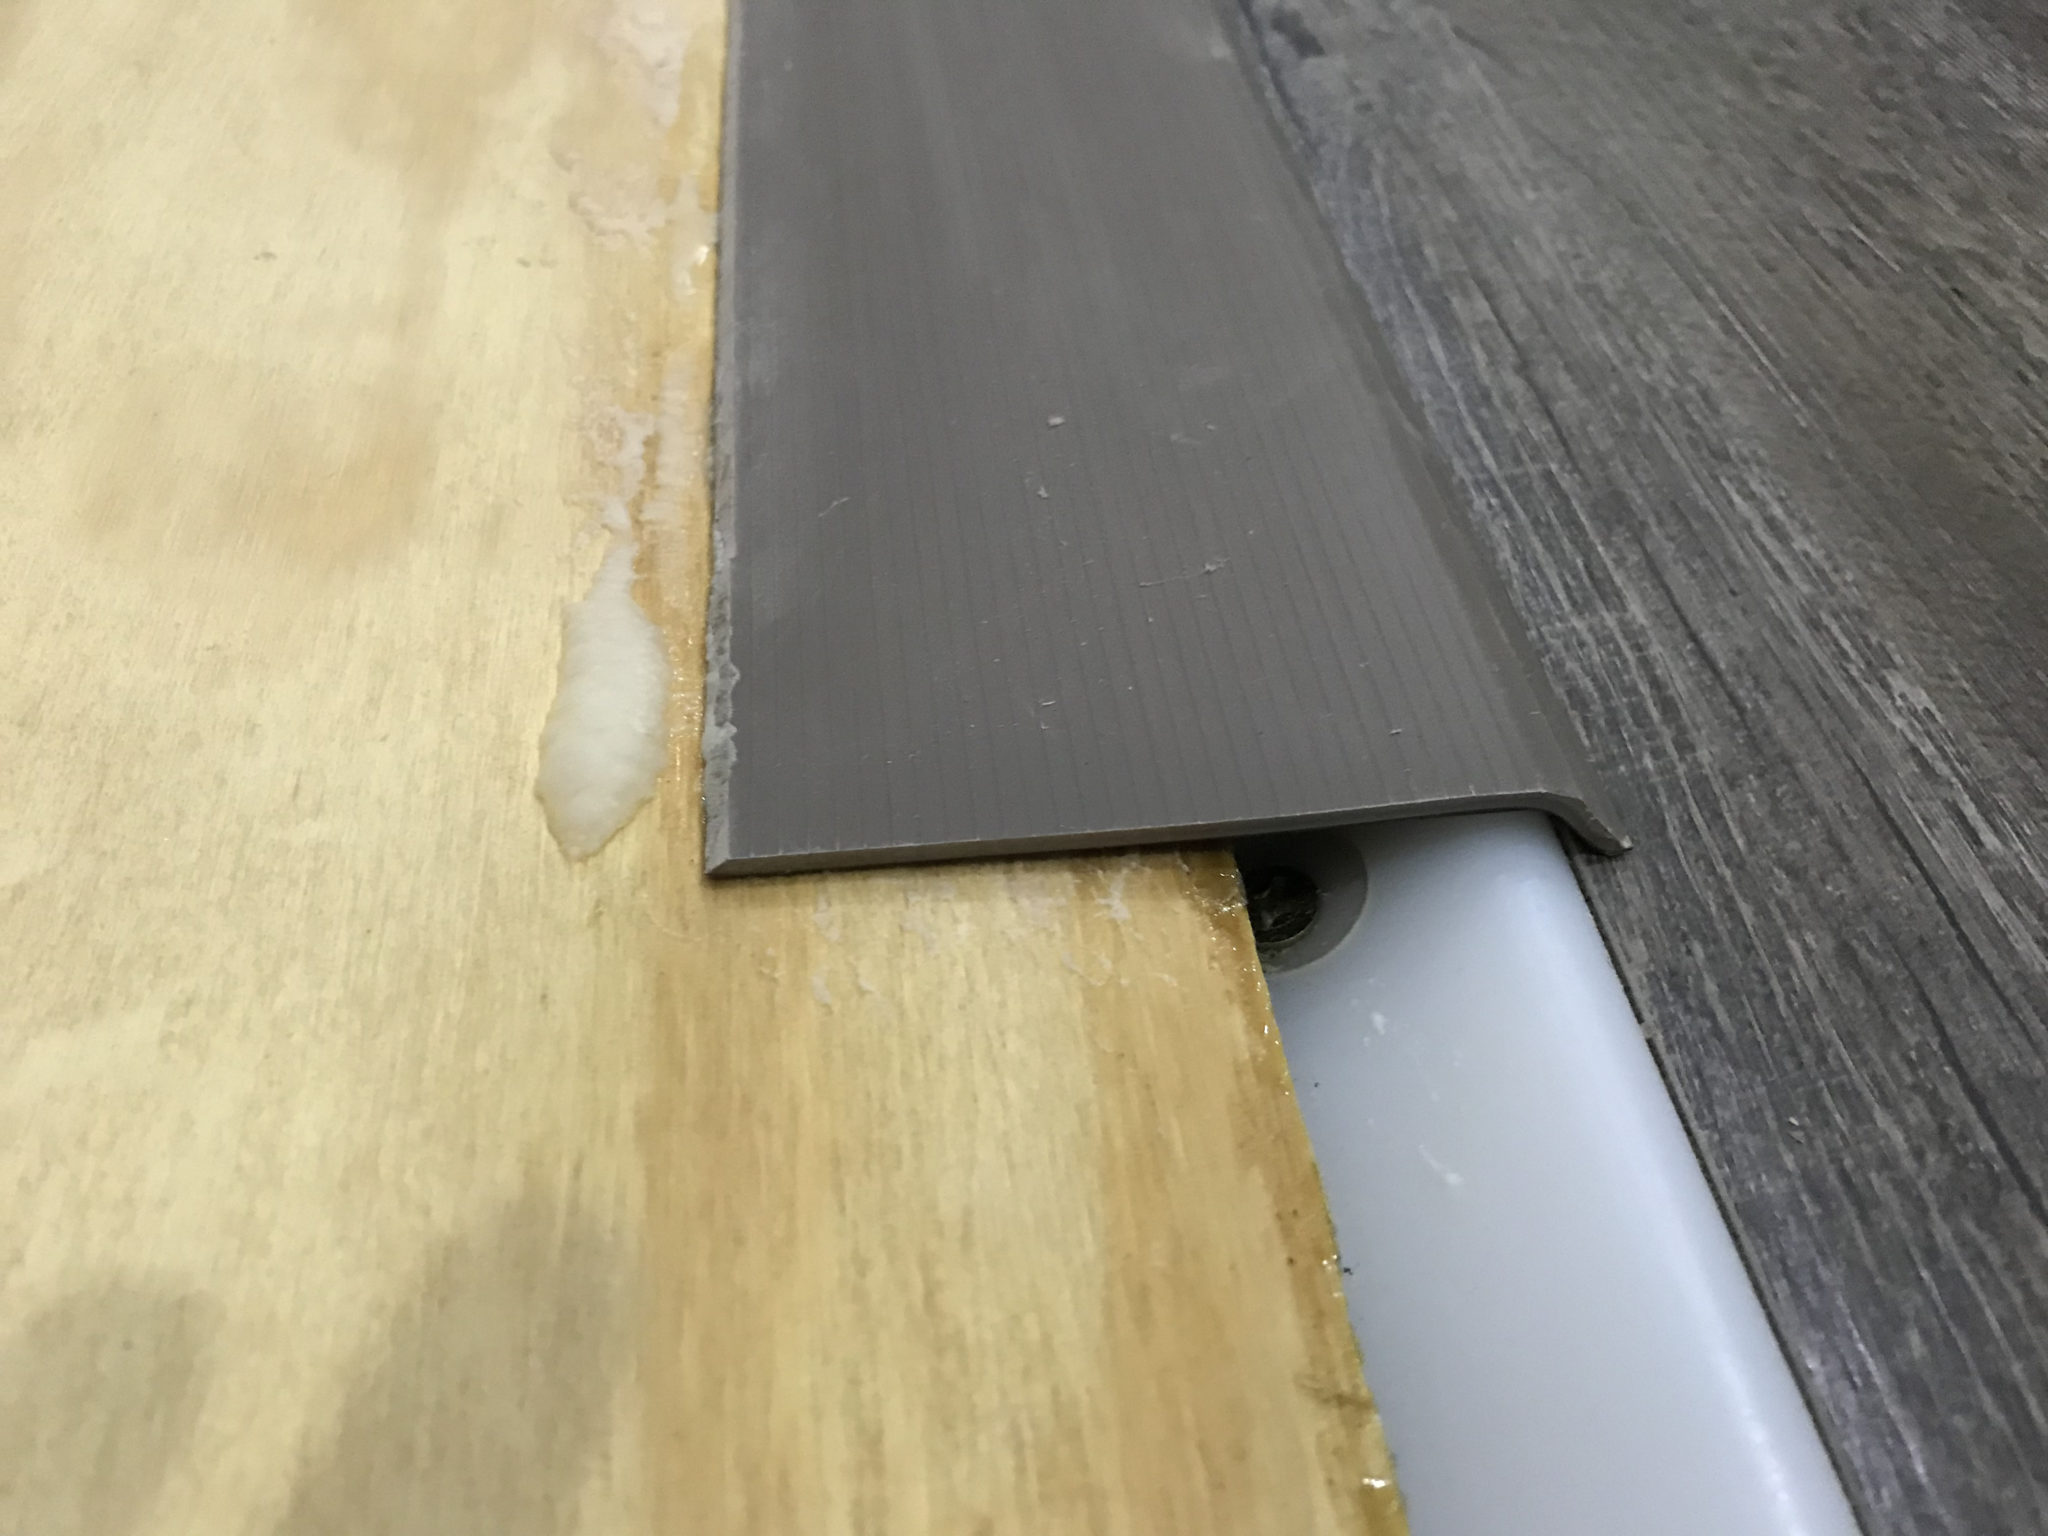
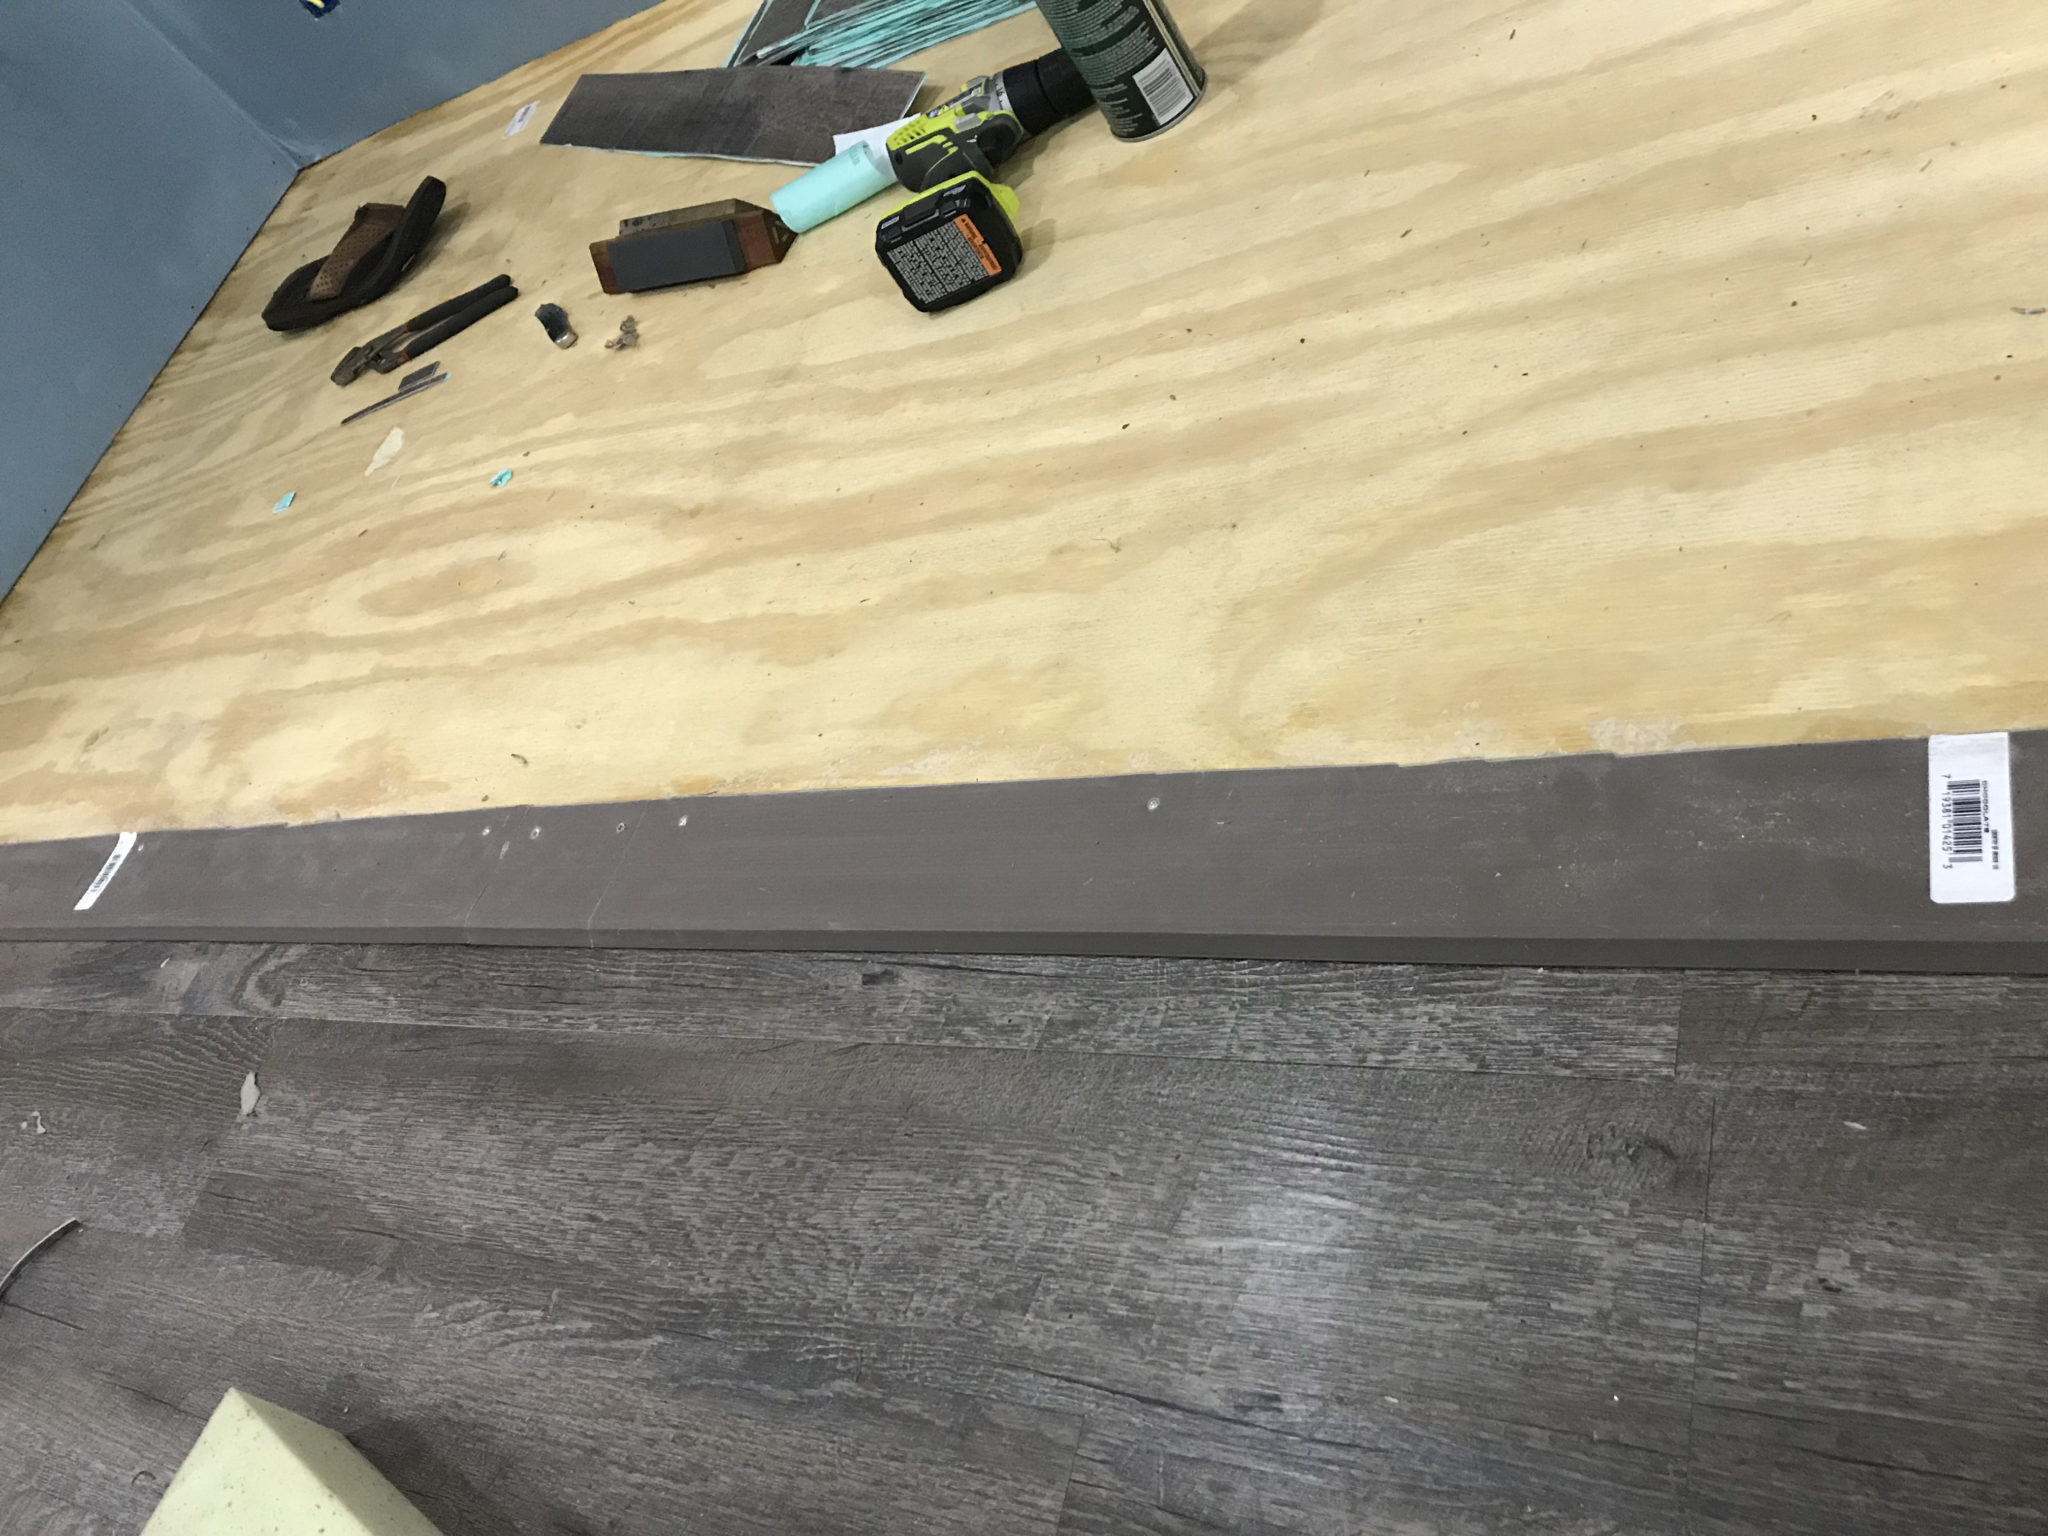
After a little bit of experimenting, Angelica and I found what we think is a nice solution. We started by trimming a small lip off the top edge of the strip at a 45-degree angle. This would smooth out the transition from the slide subfloor to the baseboard strip a little bit. Then laid the strip down on the subfloor front side down. With the bigger bottom lip pointing down and hanging far enough over the front of the slide subfloor to cover a big white plastic strip on the main floor. We applied some of our trusty spray adhesive, ran a few screws through them to hold them in place, then ran a bead of caulk to smooth the transition from the strip to slide subfloor a little more.
With baseboard strip in place, we then glued our flooring planks on top of that. The only part of the baseboard visible is the lip that is at the bottom. Since it is the backside that is facing up, it doesn’t have the glossy finish, but instead a flat brown color. Even though it is brown, and not a gray, it matches the flooring well. There is also a little bit of a hump at the transition, but we don’t think it will be much of a problem and turned out looking pretty good.
Wrapping It Up
Like I mentioned earlier in the post, instead of just relying on the adhesive that is on the planks, we sprayed them with 3M Hi Strength 90 spray adhesive also. It is a good idea to wear some rubber gloves using this stuff. No matter how hard you try, you end up getting it on your hands and it doesn’t like to come off. I mean it is heavy duty adhesive.
We also did not prime or paint the subfloor before installing the flooring. I know I have seen where other people have at least primed theirs ahead of time. Afterward, we thought that if we had to do all over again, that it might have been smart to prime it with a black or some darker colored primer first. There are a few places where there ended up being a small gap between some of the planks. The unprimed floor tends to make the gaps stand out and we think a black or a color close to the flooring color would hide them better.
In the end, we are really happy with how the RV flooring turned out. Our hope is that it will hold up good for us and our pets.
Update: We have since had to replace a few planks of flooring in the RV. It was a very simple process that turned
Be sure to check our post on how we replaced the slide sub-floor.
Please Like and Share us on social media! Also, subscribe to our email list to stay up to date on new posts! Please leave a comment telling us what you think.


Hello,
And thank you for your article. We just purchased a 2003 Arctic Fox with high hopes of renovating. We decided the only thing we really don’t want to tackle ourselves is the flooring. I called an RV flooring specialists and he said that if the existing slide, slides over carpet that the main floor (vs factory installed vinyl) carpet should be replaced by carpet due to the wheels that might scratch the vinyl. Have you found this to be a problem? Since, you are mainly stationary have you activated your slide much?
And how has the rubber base molding held up?
Thanks so much!
Thank you for your comment! So far, our flooring has held up pretty good. I did replace the planks that are on the rubber transition piece the other day. We had some futons in the slide and the legs were sitting just behind the rubber piece and had torn. The rubber base molding has held up fine so far though. As far as the main floor, since our slide doesn’t have wheels it hasn’t gotten scratched up much. There were a few planks that had some scratches that may have been from the slide. I have read where some people that have the slide wheels will put down a rug of some sort when they run their slide in.
I hope I answered your questions.
Philip
how has your floor held up? been reading online and the peel and stick planks seem to have mixed results. some people have no issues, some people have nightmares. i’m in new Mexico, and I think i’m going to try it because the i believe the dryer environment will work in my favor.
but i’m still trying to hear from people who have used the P&S planks.
thanks
So far the planks have held up pretty good over all. There has been some pretty good scratching done by the slide. And some of the planks have cracked and pieces broken off on the slide transition. We are still happy with it. The scratches could probably been prevented by having a rug on the floor for the slide to go across.

Thank you for the thoroughness of the process! I’m in the midst of redoing my floors as well and I’m super cautious about starting the slides. I have large bolts on the outside edge of the slide that I’m going to try and pull down a bit more to make more level, but the slide gap itself is confusing. Any tips on how to keep the planks from cracking over time once placed over the wall base?
Ours mainly cracked where we have our office chairs constantly running over it. If the transition doesn’t get stepped on a lot it’s not as bad about cracking.
Well me and the better half have been full time r.veeers for 5,years now.we have a 30′ Vlight flagstaff travel trailer.and as you guys .said yep !! Lets do the floors and walls.eliminating love seat /hide a bed,removing the 4 dinett chairs and table.replacing with rocker recliners and such.so the carpet with grandchildren.is no more than an old rug.my biggest question has been how to deal with the slide outs.we have 2 one on each side of living room.but after seeing your flooring and,and the answers to my questions about the slide outs.hell im in.nice job on your flooring and appreciate your input
Thank you safe travles respectfully Tim an jenni
Thank you Tim!
Good luck on your flooring and safe travels.
Philip
Hello I keep coming back to study your process. I took the carpet off my slide there’s a wide metal strip at the edge the screwheads stick up a fair bit which makes a problem for laying the new click planks wondering if I can leave this metal strip off? Thanks
I’m not sure what the metal strip is there for, but you could get some tapered head screws that would not stick up like normal screws do.
With the peel and stick flooring, did you need to use spacers on the outside areas?
No I didn’t use any spacers I just trimmed pieces to fill any gaps the best I could.
My wife and I just bought a 2002 sunny Brook camper and looking to remodel the inside before camping in it and the carpet definitely needs to go thank you for your post I will be trying everything you said on our camper to get the floor in
Great article! I’m planning on re-doing the floor in our 2007 Winnebago. In all the articles I’ve seen of this being done, everyone runs the flooring the long way down the floor from front to back. Is there a reason to do it this way instead of crossways? Fewer short strips if done the long way maybe?
I think it’s done mainly for looks. In our current RV I laid it crossways instead.
Great! Did you have issues with having lots of short pieces like a foot or so?
Thanks for your reply!
I had a lot of short pieces but I used a good many of them.